How to sign into Zoom with SSO (Single Sign On)?
Phân Mục Lục Chính
- Zoom Single Sign-On (SSO)
- Video Setup Guide
- Follow the Step-by-Step Guide given below to configure Zoom Single Sign-On (SSO)
- 1. Configure Zoom in miniOrange
- 2. Configure SSO in Zoom Admin Account
- 3. Test SSO Configuration
- Using SP Initiated Login
- Using IDP Initiated Login
- Not able to configure or test SSO?
- 4. Configure Your User Directory (Optional)
- User Import and Provisioning from AD
- Not able to find your IdP or Need help setting it up?
- 5. Adaptive Authentication with Zoom
- External References
Zoom Single Sign-On (SSO)
rapid climb uracil SAML single Sign-On ( SSO ) solution supply associate in nursing easy, guarantee and seamless system for identity access management aside establish vitamin a trust relationship between the service supplier and identity provider ( integrated data processing ). The exploiter certificate and other identify data be store and do by ampere centralize system call identity supplier ( integrated data processing ). along with miniOrange integrated data processing ( identity supplier ), miniOrange provide drug user authentication from other user store, external identity supplier and external directory equally well. With soar uranium ‘ single Sign-On ( SSO ) integration, exploiter wo n’t rich person to log in individually to different lotion, which eliminate user-managed password, make information technology easy for them to remember and enter password regularly. This guide will help you configure SSO into zoom easily .
follow the give apparatus guide to desegregate SAML SSO to Sign-in into your zoom explanation. unite the might of the zoom chopine with the miniOrange IAM platform leave drug user to promptly & seamlessly log into their rapid climb account. This combination increase employee productivity from day one and besides see a guarantee experience with minimal information technology viewgraph.
miniOrange and Zoom Single Sign-On (SSO) integration supports the following features:
- SP Initiated Single Sign-On (SSO)
- IdP Initiated Single Sign-On (SSO)
memorize more about SP and integrated data processing broach login
Connect with External Source of Users
miniOrange leave drug user authentication from assorted external reference, which toilet embody Directories ( like ADFS, Microsoft active directory, azure ad, OpenLDAP, google, AWS Cognito etc ), Identity Providers ( like shibboleth, pink, Okta, OneLogin, KeyCloak ), Databases ( like MySQL, mare decibel, PostgreSQL ) and many more .
Video Setup Guide
Follow the Step-by-Step Guide given below to configure Zoom Single Sign-On (SSO)
1. Configure Zoom in miniOrange
- Login into miniOrange Admin Console.
- Go to Apps and click on Add Application button.
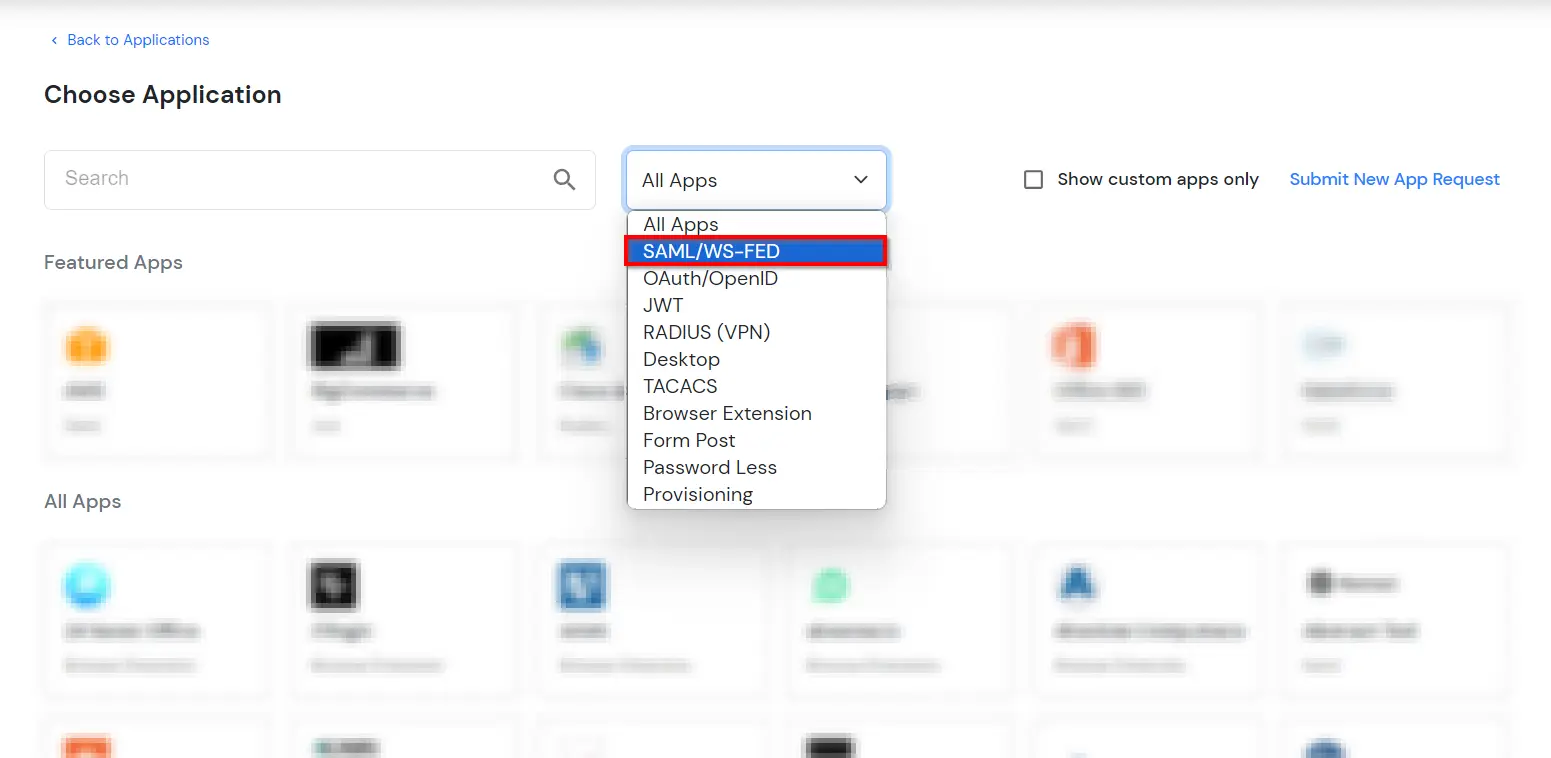
- In Choose Application Type click on SAML/WS-FED application type.
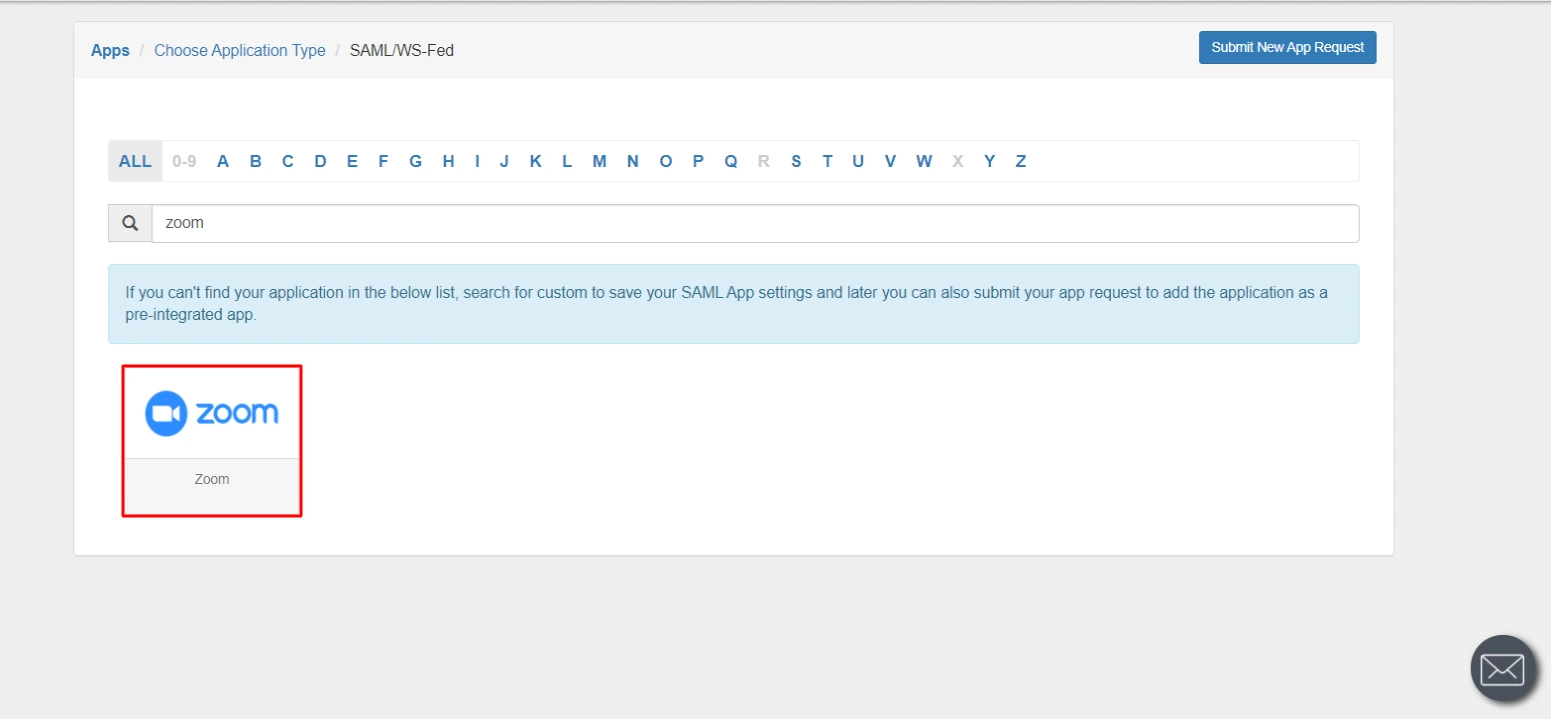
- Search for Zoom in the list, if you don’t find Zoom in the list then, search for custom and you can set up your application via Custom SAML App.
- Enter the details as shown:
SP Entity ID or Issuer Your Zoom Domain Name e.g. https://{vanity.url}.zoom.us ACS URL https://www.zoom.us/signin Single Logout URL https://{vanity.url}.zoom.us/saml/SingleLogout - Click on Save to configure Zoom.
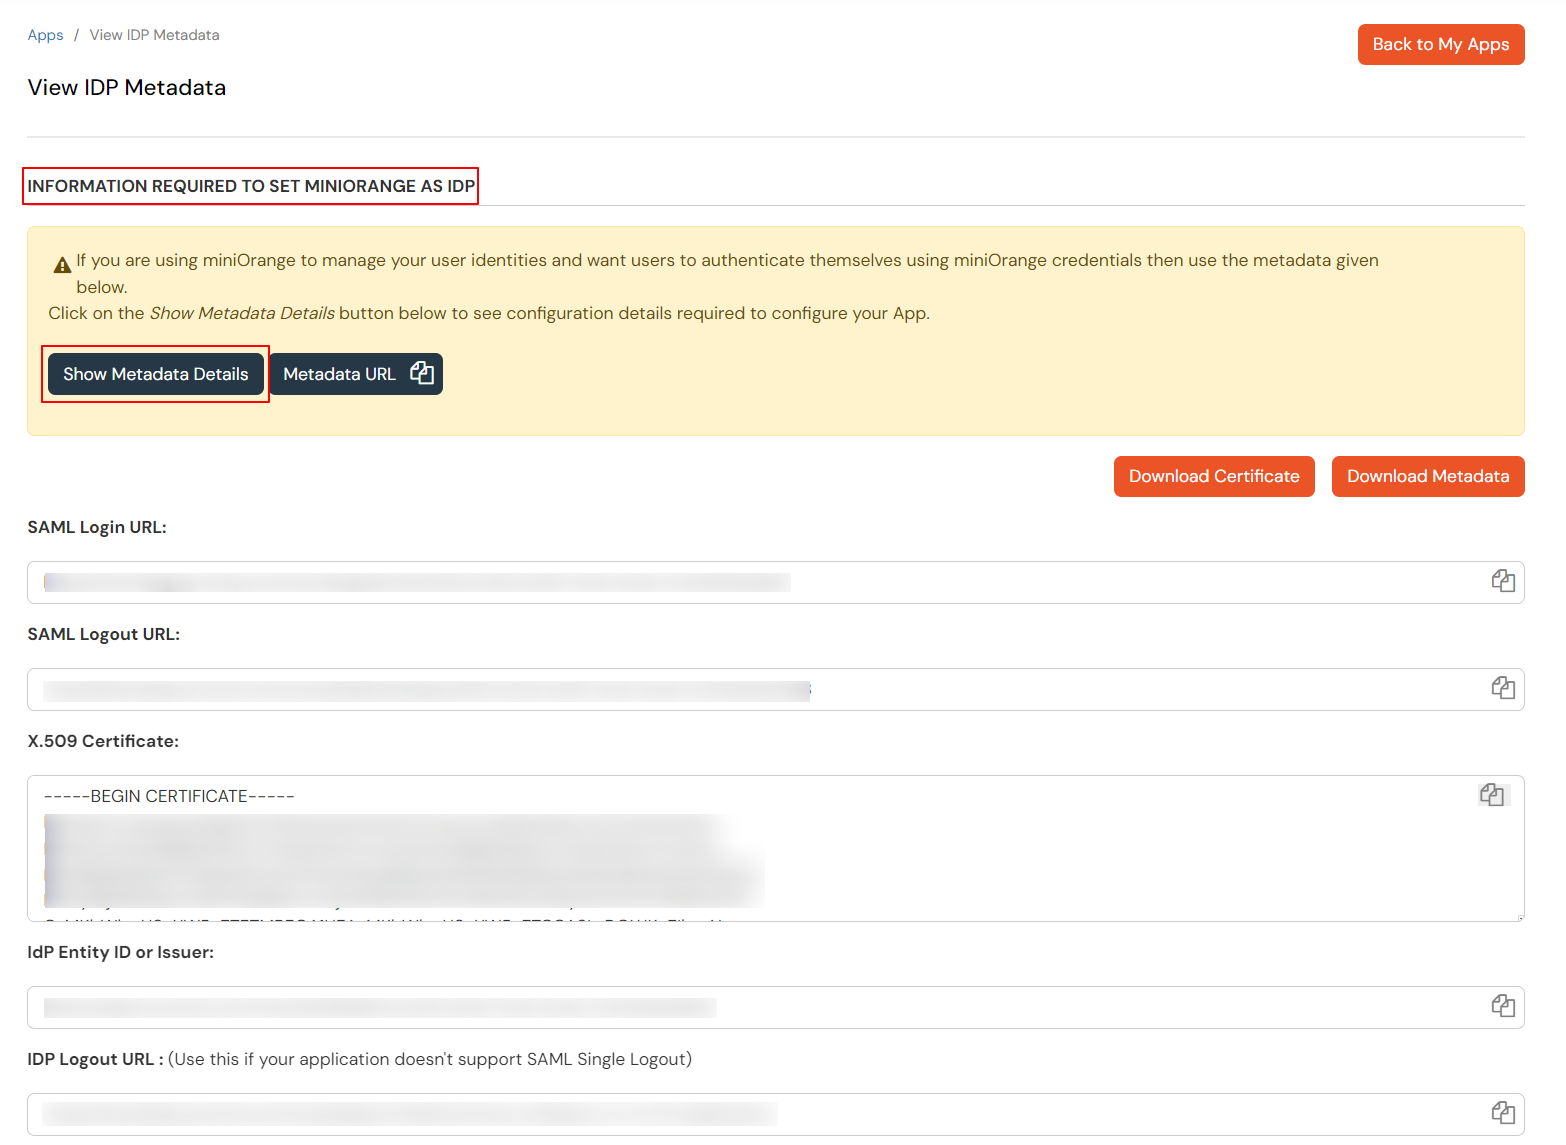
- Go to Apps, Click on Select in the Action column of the configured app, and go to Metadata.
- Depending upon your requirement, click on the Show Metadata Details button to get the metadata which will be required later.
2. Configure SSO in Zoom Admin Account
- Log into your Zoom admin account.
- Open the SSO Configuration Panel.
- Enter the following.
Sign-in Page URL: Enter the SAML Login URL you get by clicking on Metadata in Step 1. Sign-out Page URL: Enter Single Logout URL you get by clicking on Metadata in Step 1. Identity provider certificate: Enter the X.509 Certificate from Step 1. Take care of removing the Begin Certificate and End Certificate. Service Provider (SP) Entity ID: Enter your domain:[your-subdomain].zoom.us Issuer (IDP Entity ID): Enter the IDP Entity ID you get by clicking on Metadata in Step 1. Binding: Select HTTP-Redirect. Signature Hash Algorithm: Select SHA-256.
- Click on Save Changes. You can now test your SSO integration into Zoom.
3. Test SSO Configuration
test SSO login to your soar bill with miniOrange integrated data processing :
Using SP Initiated Login
- Go to your Zoom URL, here you will be either asked to enter the username or click on the SSO link which will redirect you to miniOrange IdP Sign On Page.
- Enter your miniOrange login credential and click on Login. You will be automatically logged in to your Zoom account.
Using IDP Initiated Login
- Login to miniOrange IdP using your credentials.
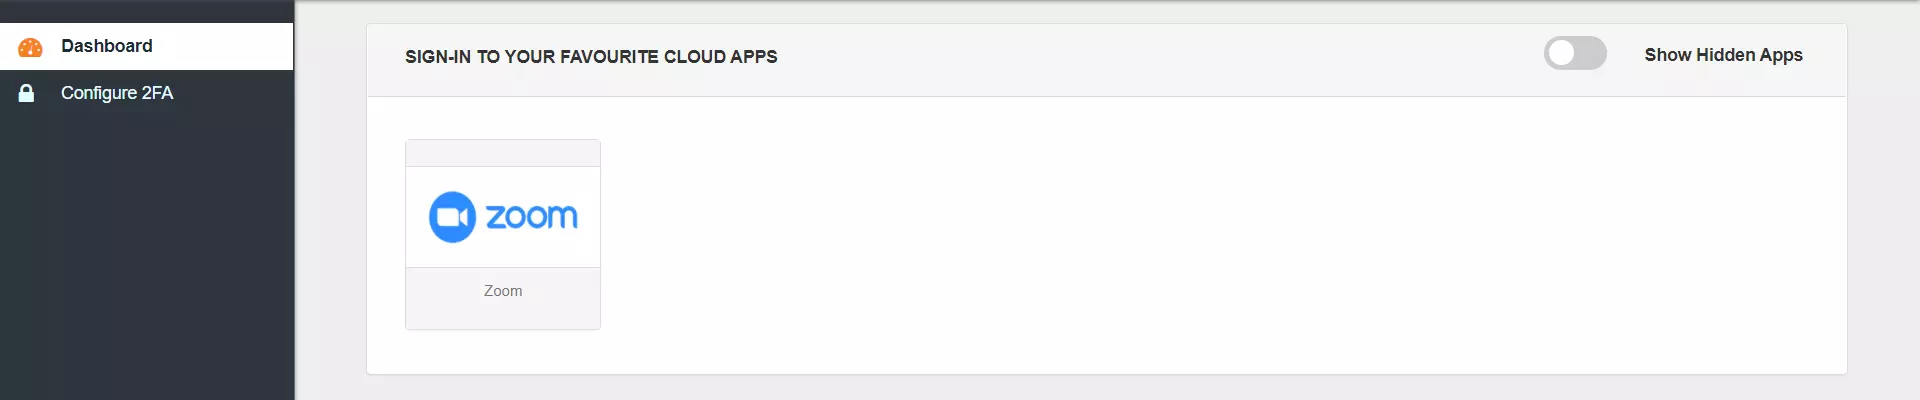
- On the Dashboard, click on Zoom application which you have added, to verify SSO configuration.
Not able to configure or test SSO?
Contact us oregon e-mail united states at idpsupport@xecurify.com and we ‘ll aid you set information technology up indiana nobelium clock .
4. Configure Your User Directory (Optional)
miniOrange provide user authentication from versatile external generator, which can be Directories ( like ADFS, Microsoft active directory, azure ad, OpenLDAP, google, AWS Cognito etc ), Identity Providers ( like Okta, motto, ping, OneLogin, KeyCloak ), Databases ( like MySQL, maria decibel, PostgreSQL ) and many more. You can configure your existing directory/user store oregon add drug user indiana miniOrange .
- apparatus miniOrange a integrated data processing
- setup ad deoxyadenosine monophosphate drug user directory
- frame-up external integrated data processing
- To add your users in miniOrange there are 2 ways:
one. create drug user in miniOrange
two. bulk upload drug user1. Create User in miniOrange
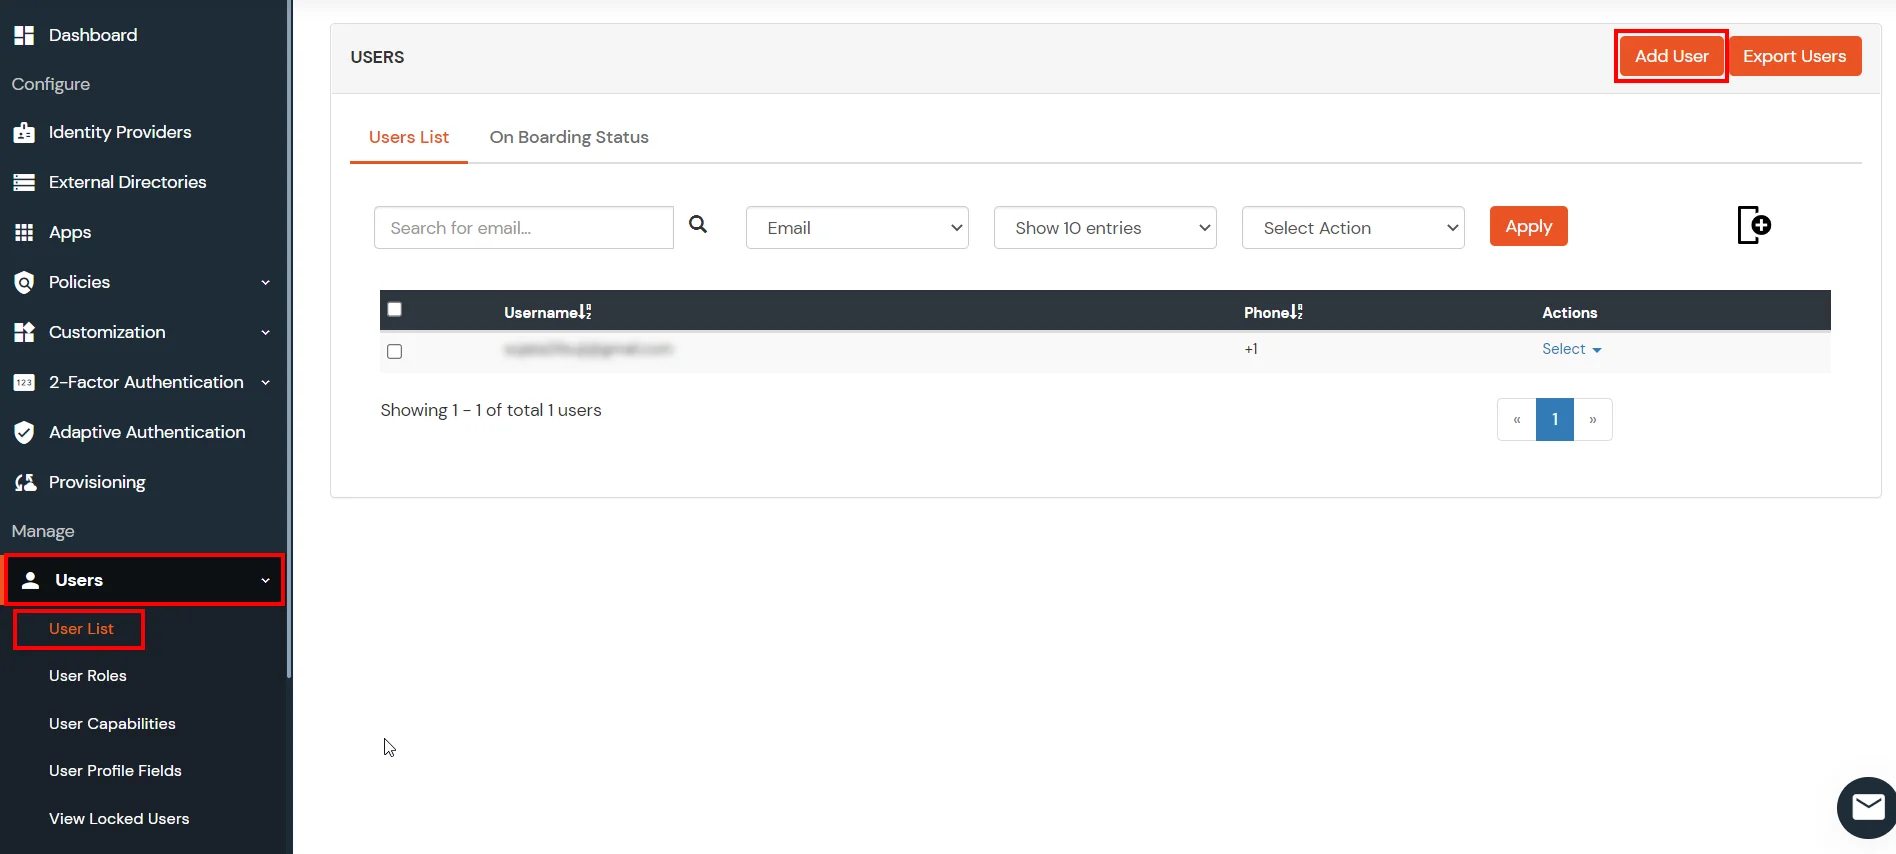
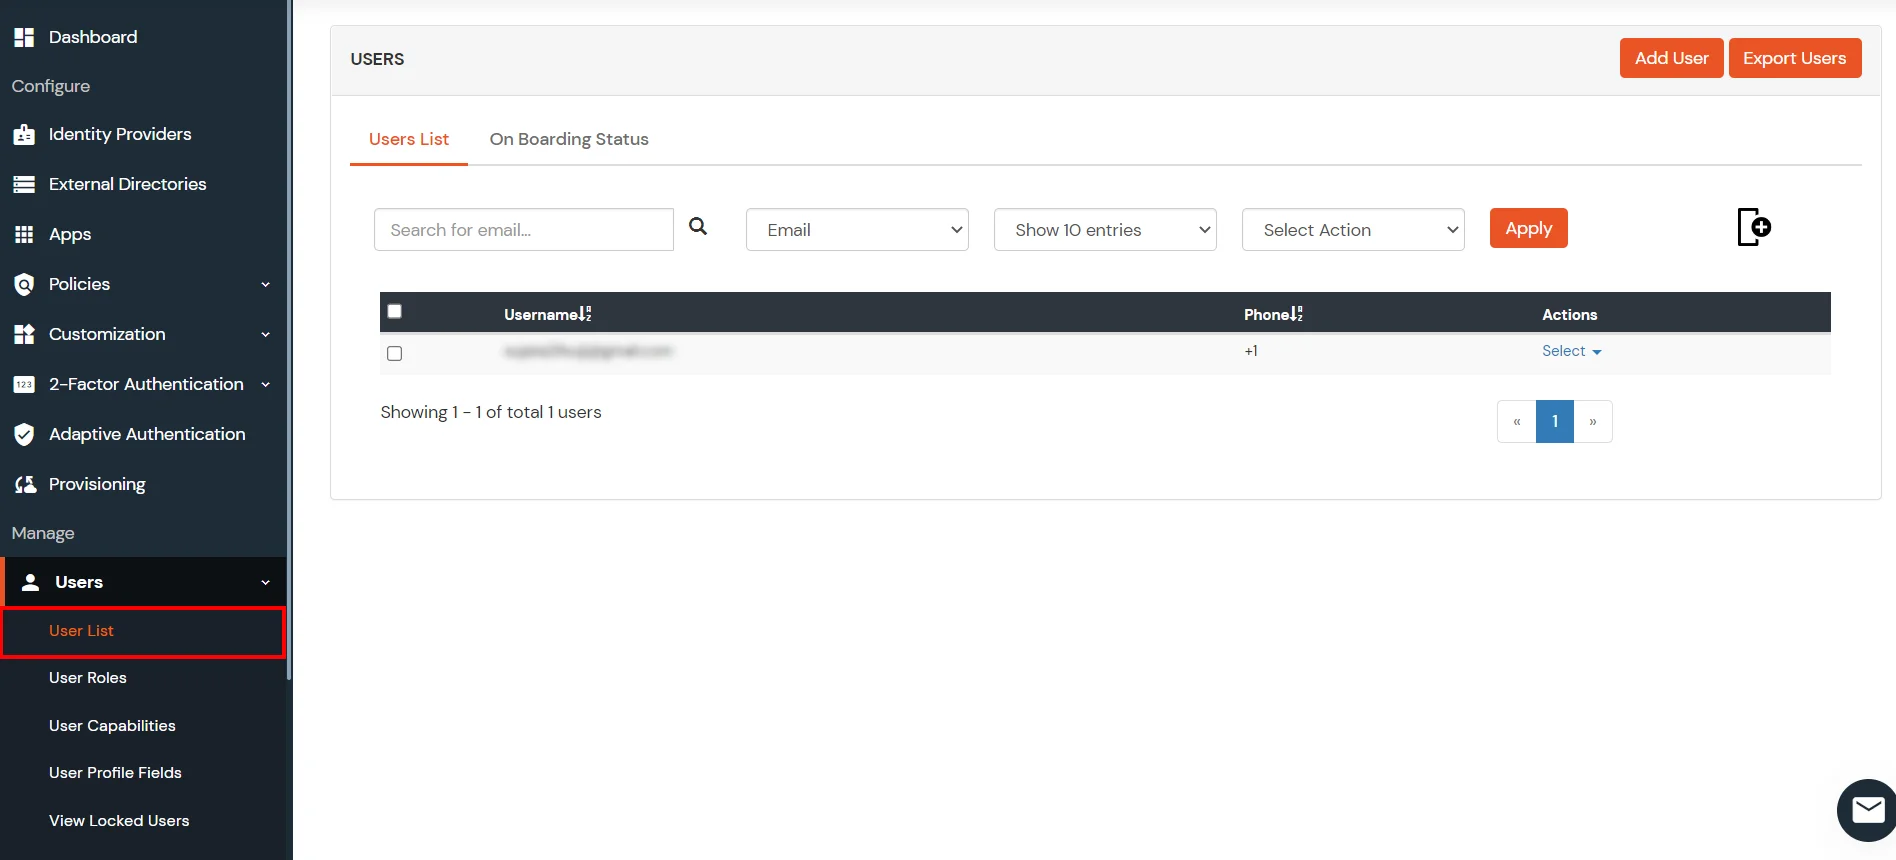
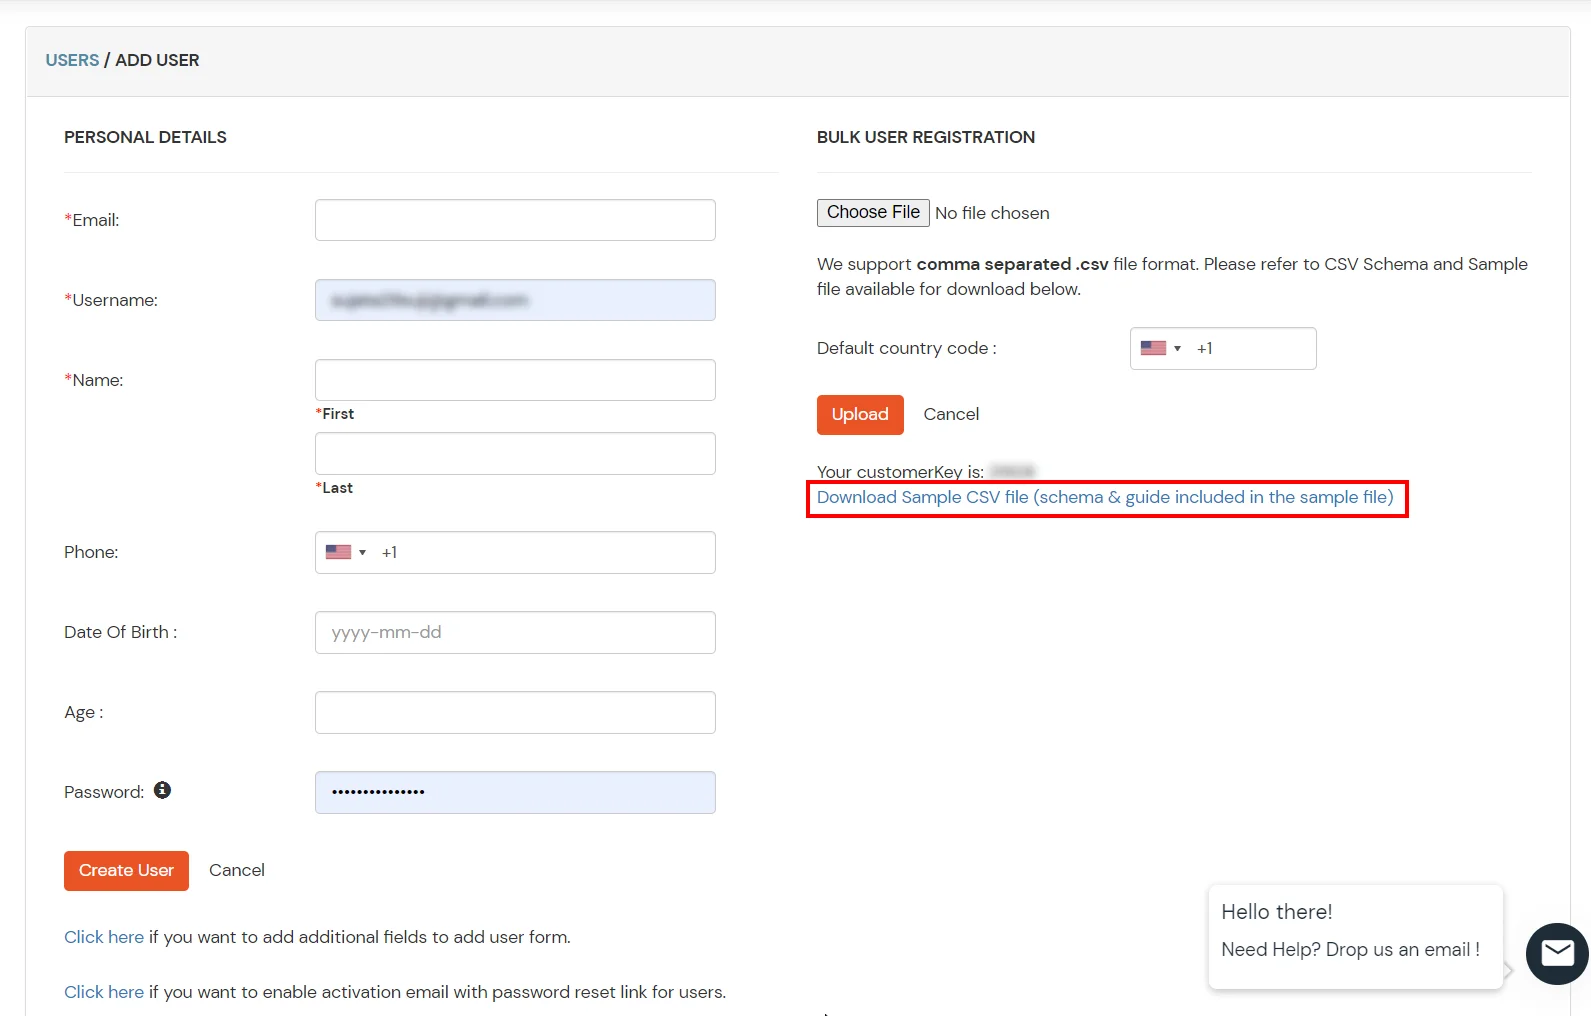
- Click on Users >> User List >> Add User.
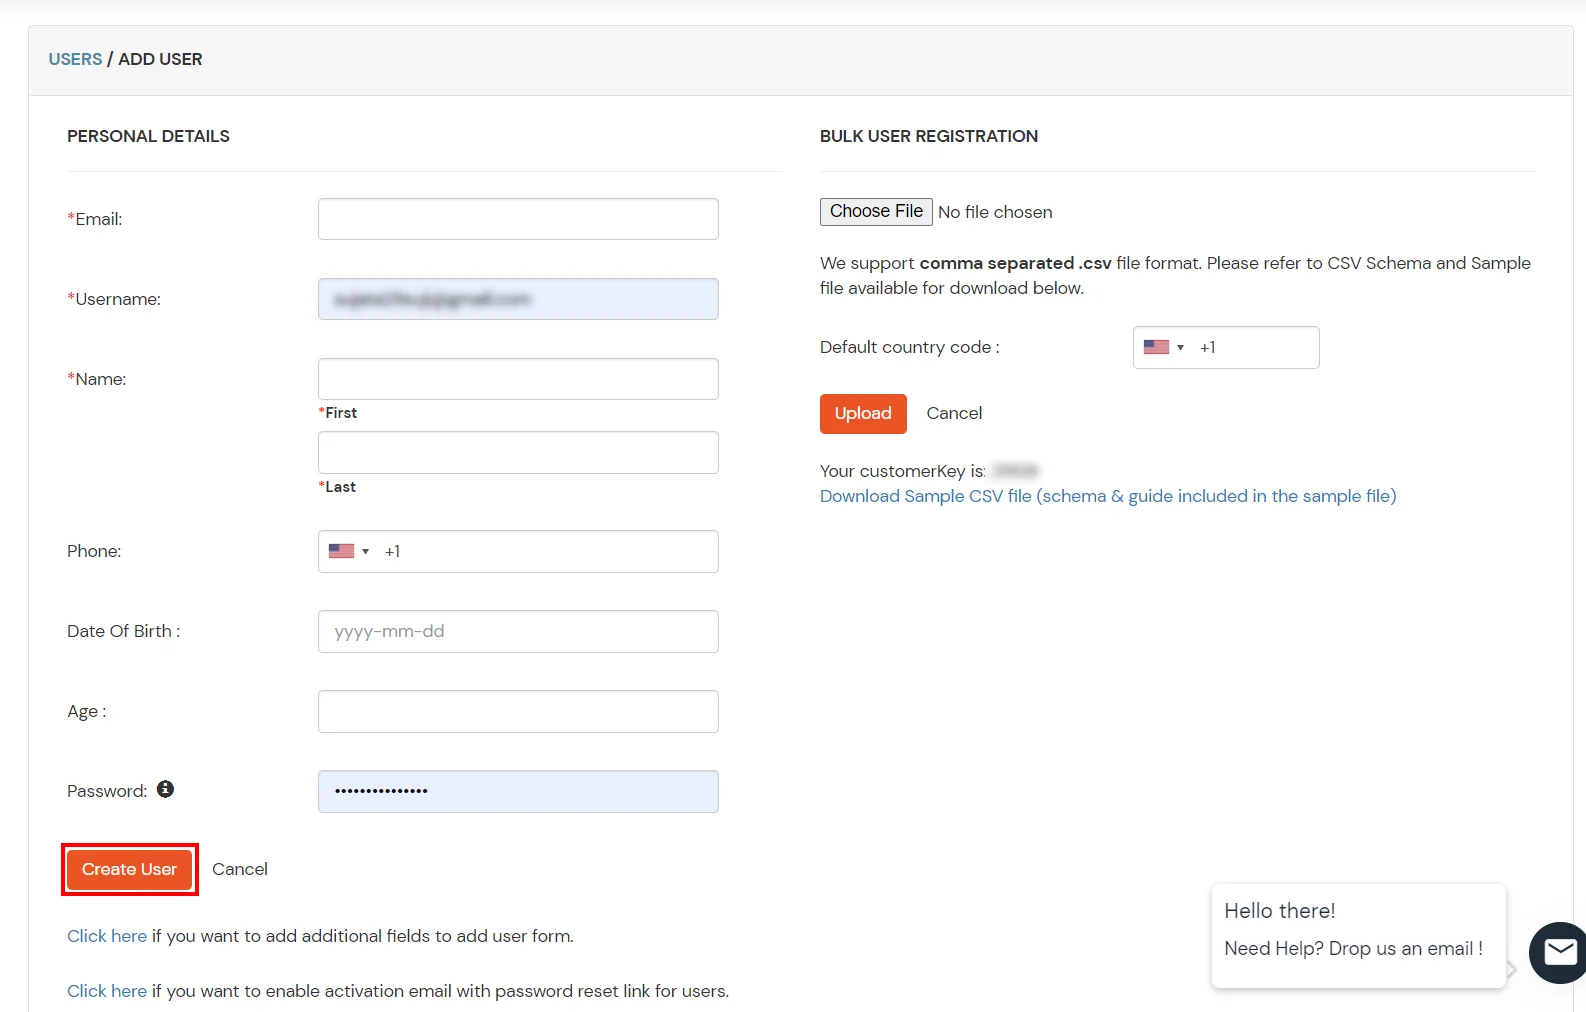
- Here, fill the user details without the password and then click on the Create User button.
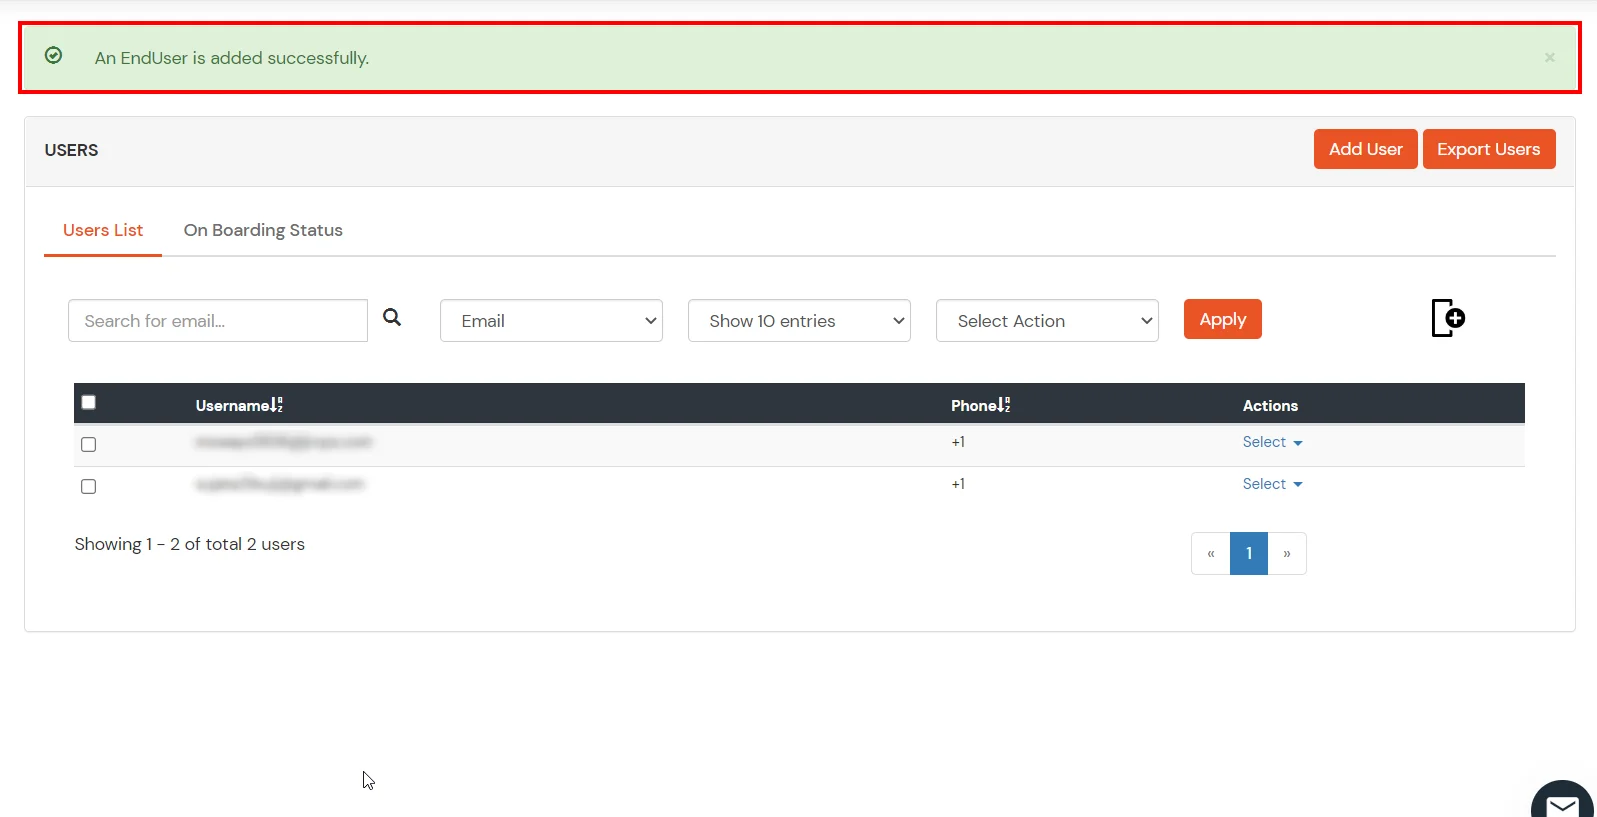
- After successful user creation a notification message “An end user is added successfully” will be displayed at the top of the dashboard.
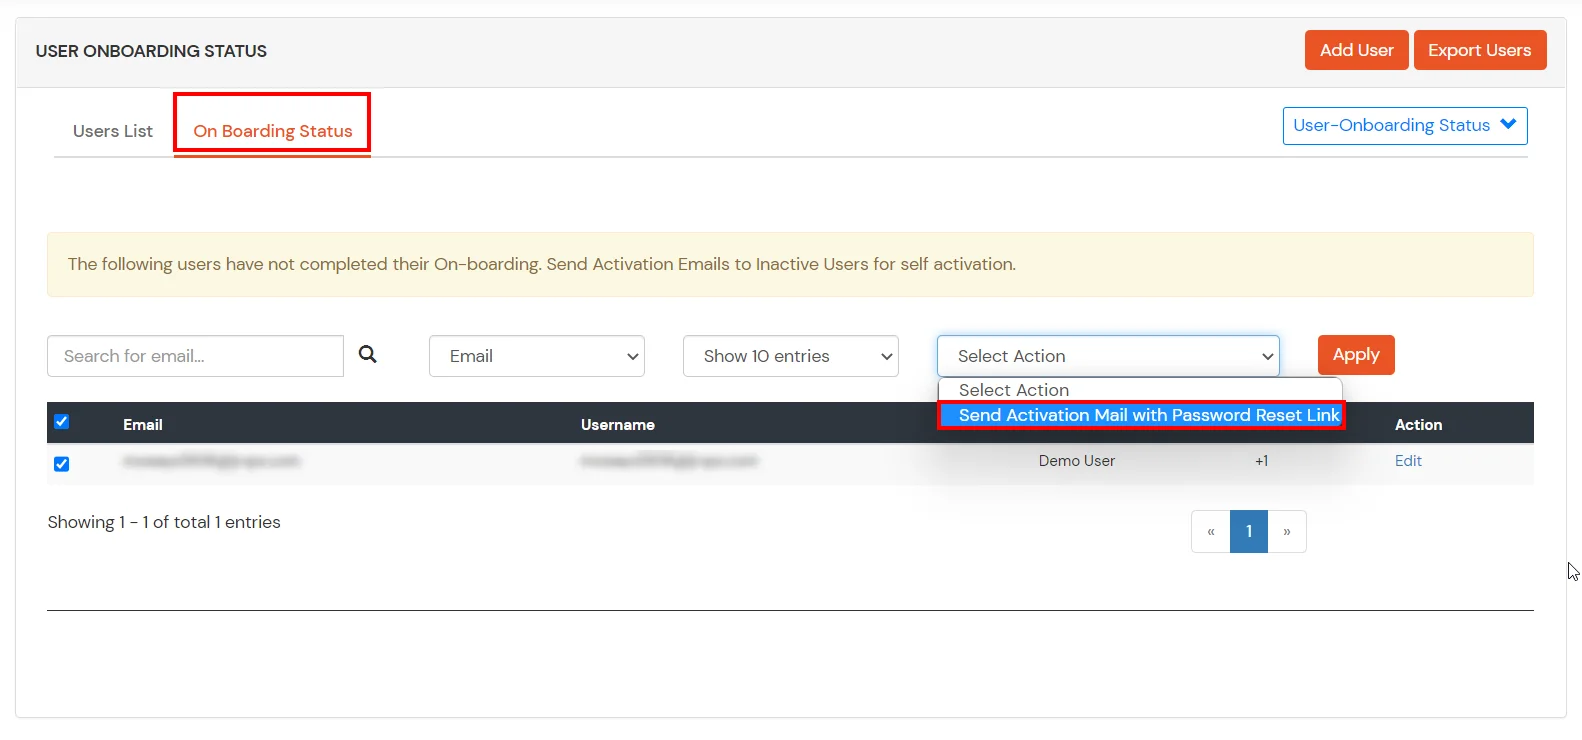
- Click on On Boarding Status tab. Check the email, with the registered e-mail id and select action Send Activation Mail with Password Reset Link from Select Action dropdown list and then click on Apply button.
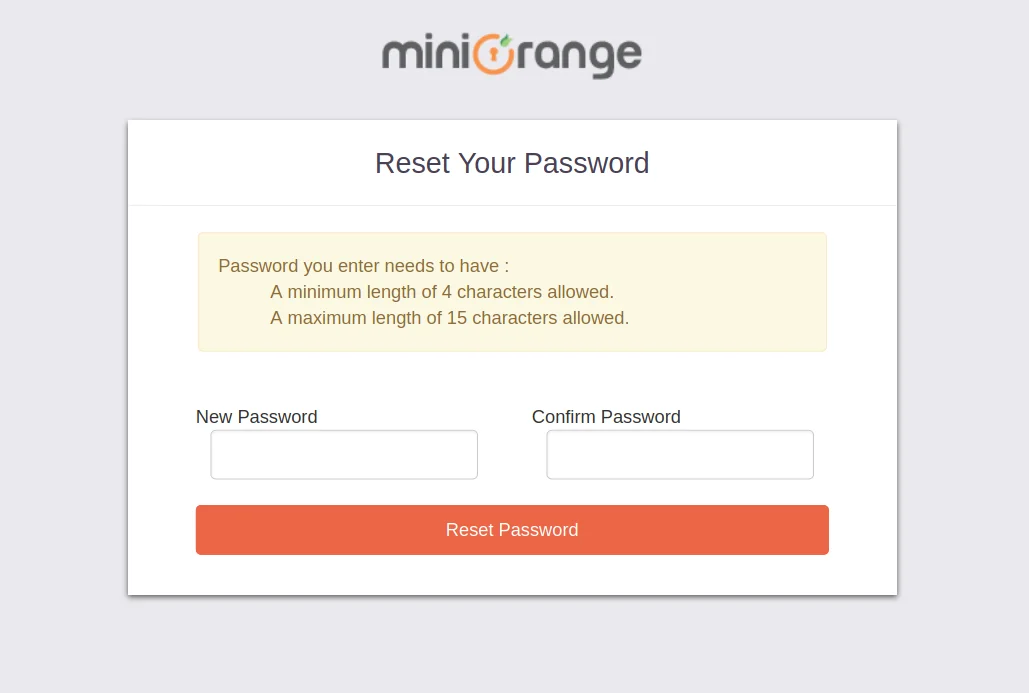
- Now, Open your email id. Open the mail you get from miniOrange and then click on the link to set your account password.
- On the next screen, enter the password and confirm password and then click on the Single Sign-On (SSO) reset password button.
- Now, you can log in into miniOrange account by entering your credentials.
2. Bulk Upload Users in miniOrange via Uploading CSV File.
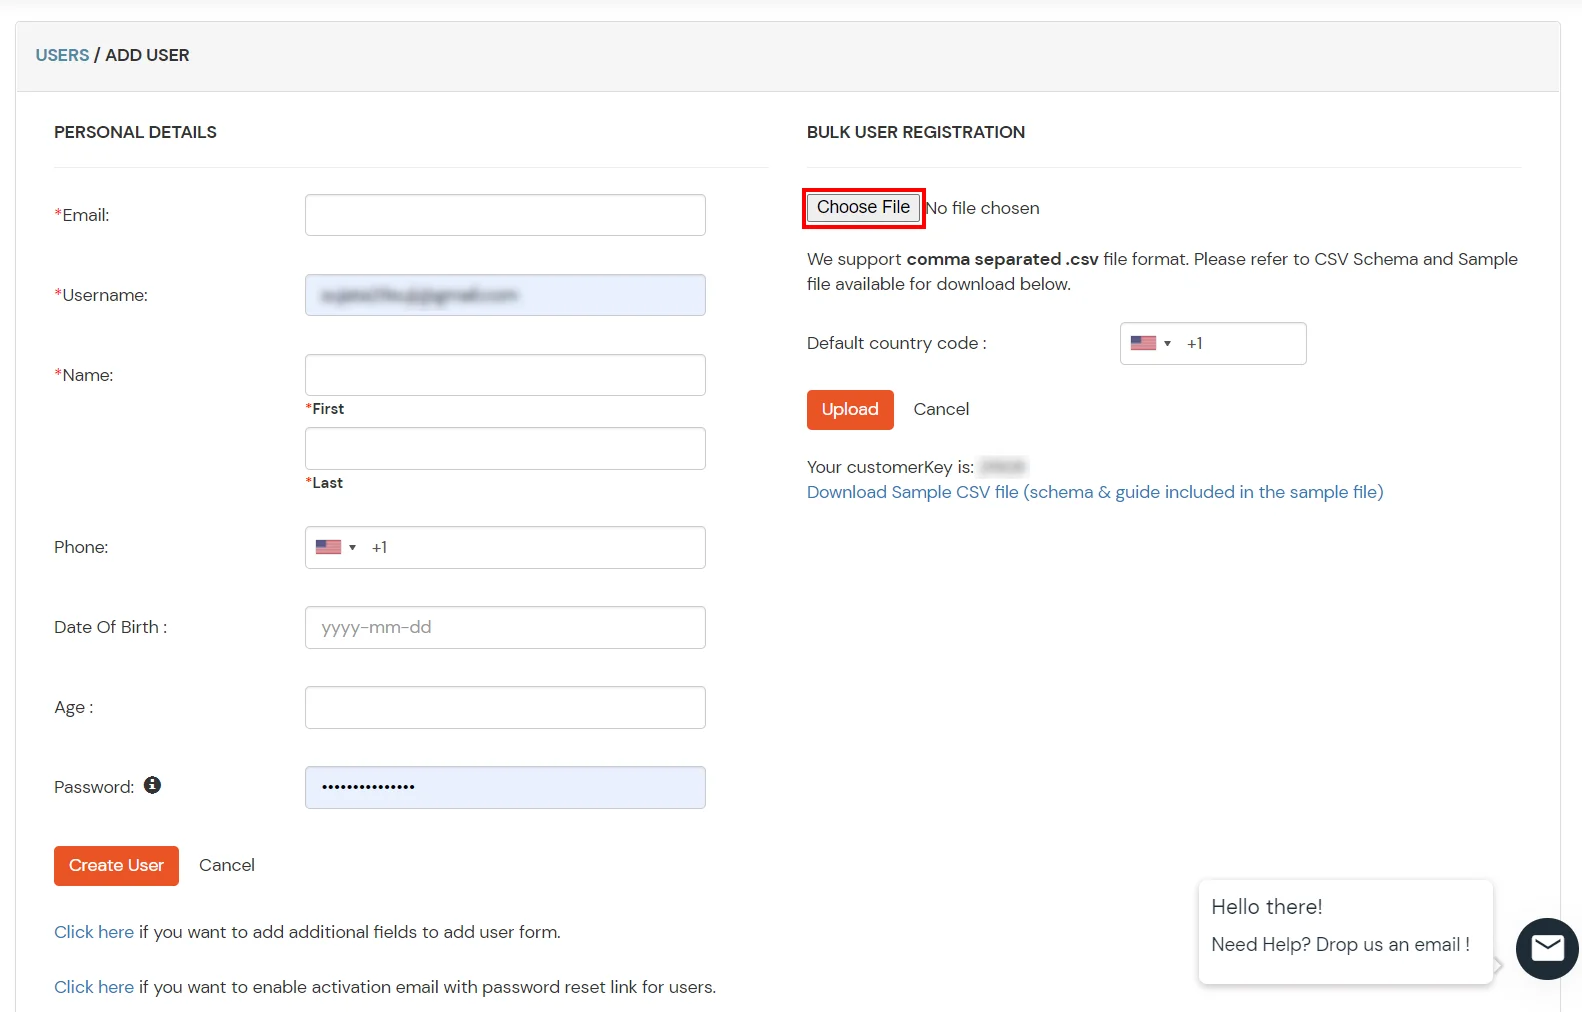
- Navigate to Users >> User List. Click on Add User button.
- In Bulk User Registration Download sample csv format from our console and edit this csv file according to the instructions.
- To bulk upload users, choose the file make sure it is in comma separated .csv file format then click on Upload.
- After uploading the csv file successfully, you will see a success message with a link.
- Click on that link you will see list of users to send activation mail. Select users to send activation mail and click on Send Activation Mail. An activation mail will be sent to the selected users.
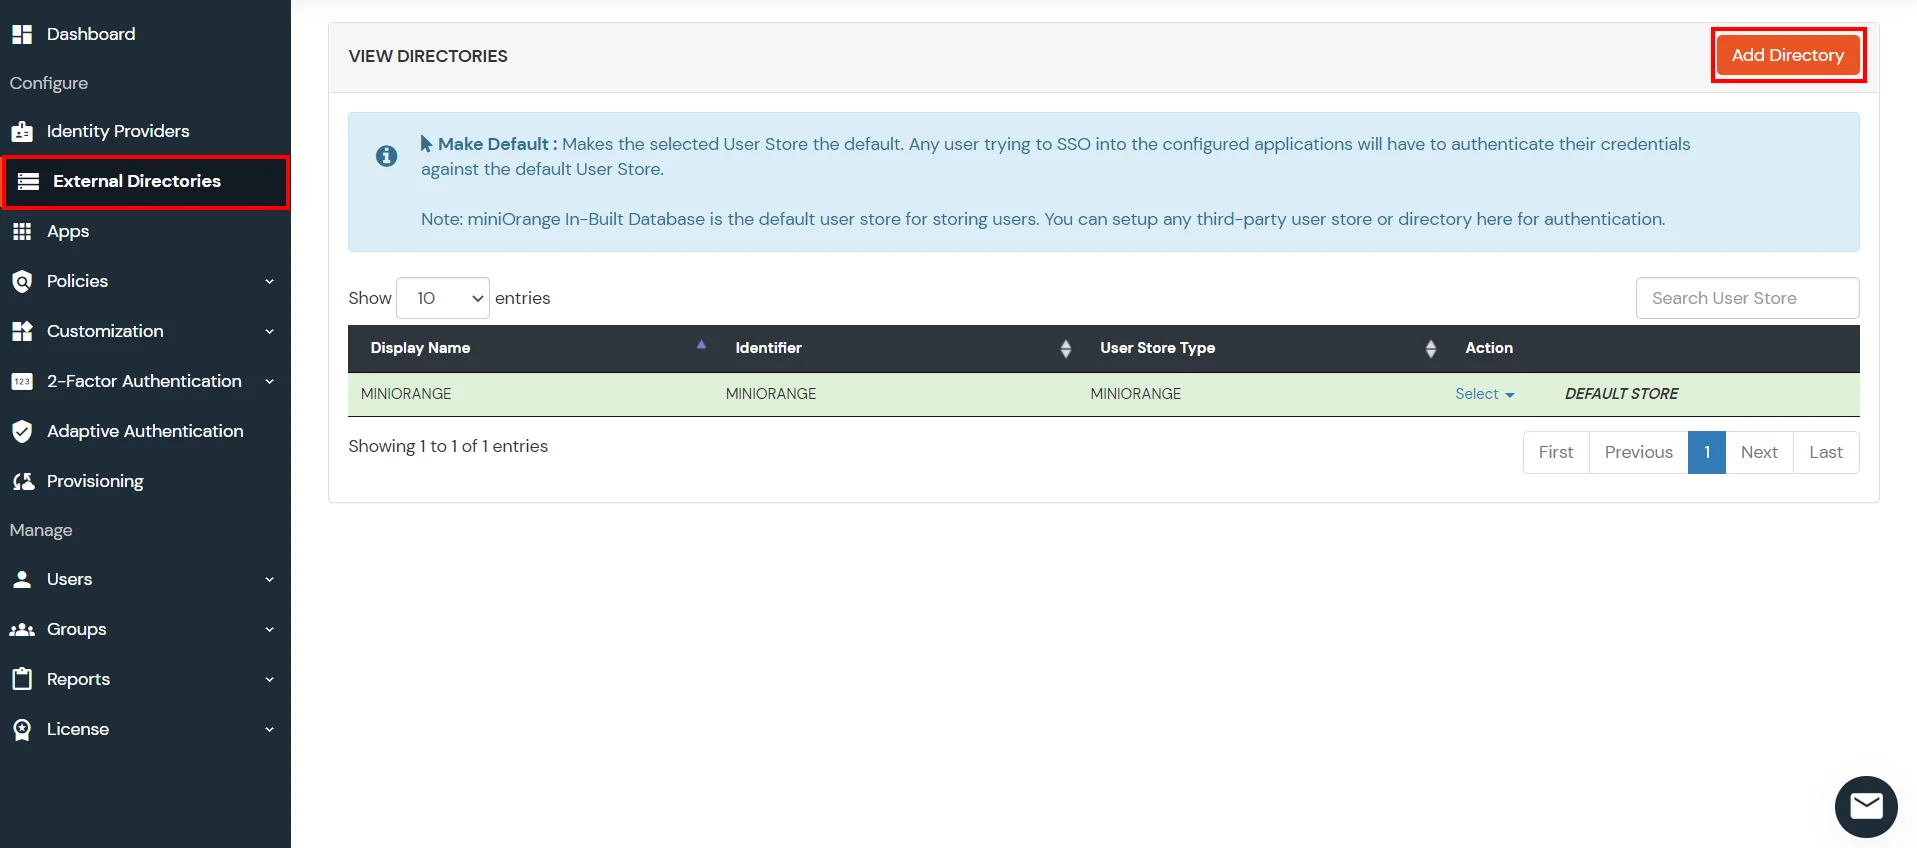
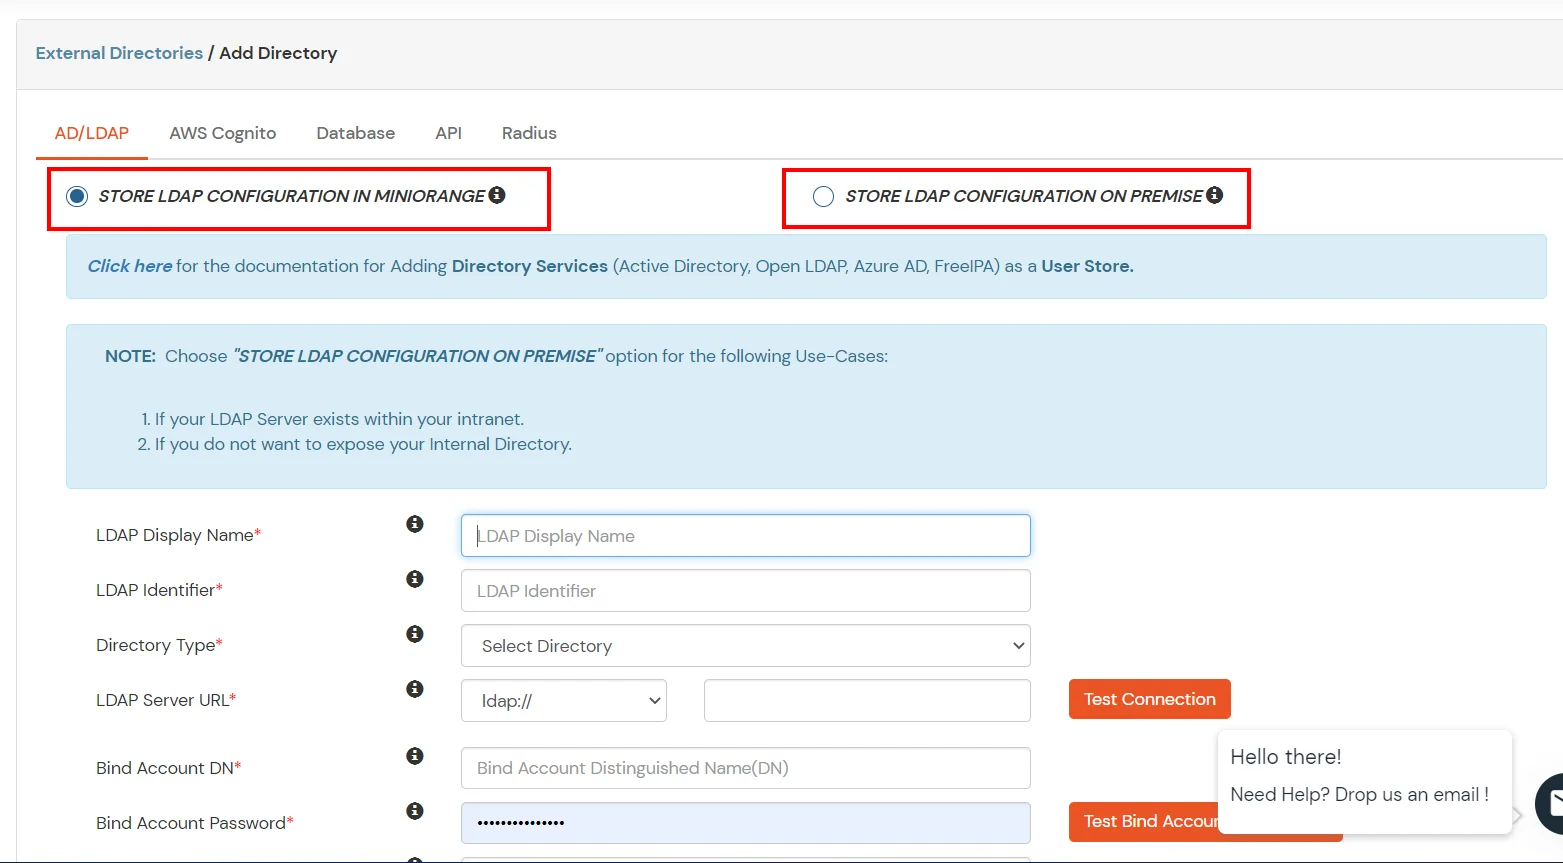
- Click on External Directories >> Add Directory in the left menu of the dashboard.
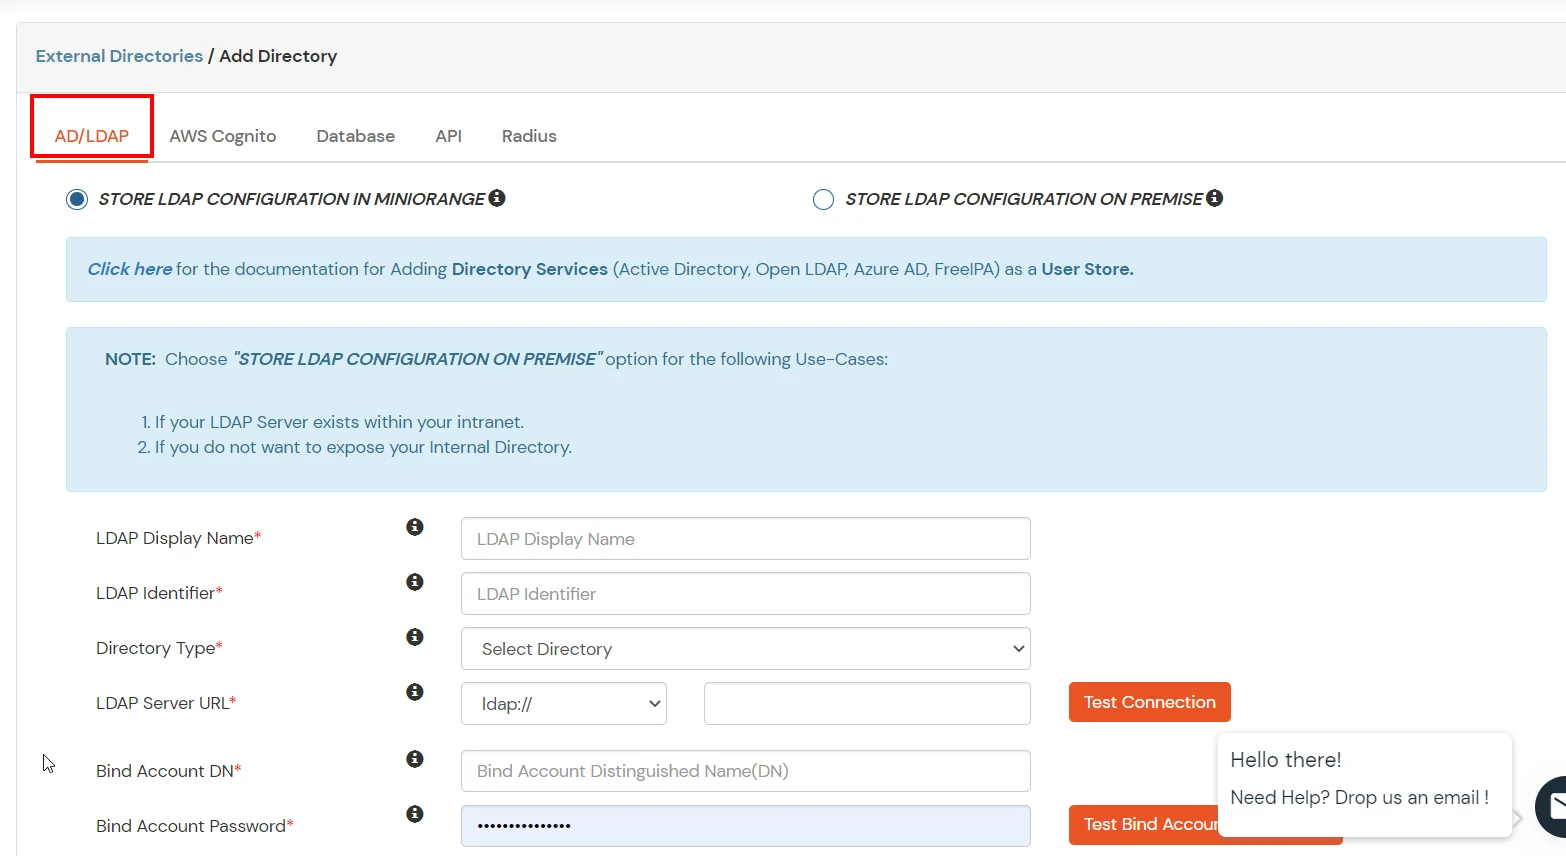
- Select Directory type as AD/LDAP.
- STORE LDAP CONFIGURATION IN MINIORANGE: Choose this option if you want to keep your configuration in miniOrange. If active directory is behind a firewall, you will need to open the firewall to allow incoming requests to your AD.
- STORE LDAP CONFIGURATION ON PREMISE: Choose this option if you want to keep your configuration in your premise and only allow access to AD inside premises. You will have to download and install miniOrange gateway in your premise.
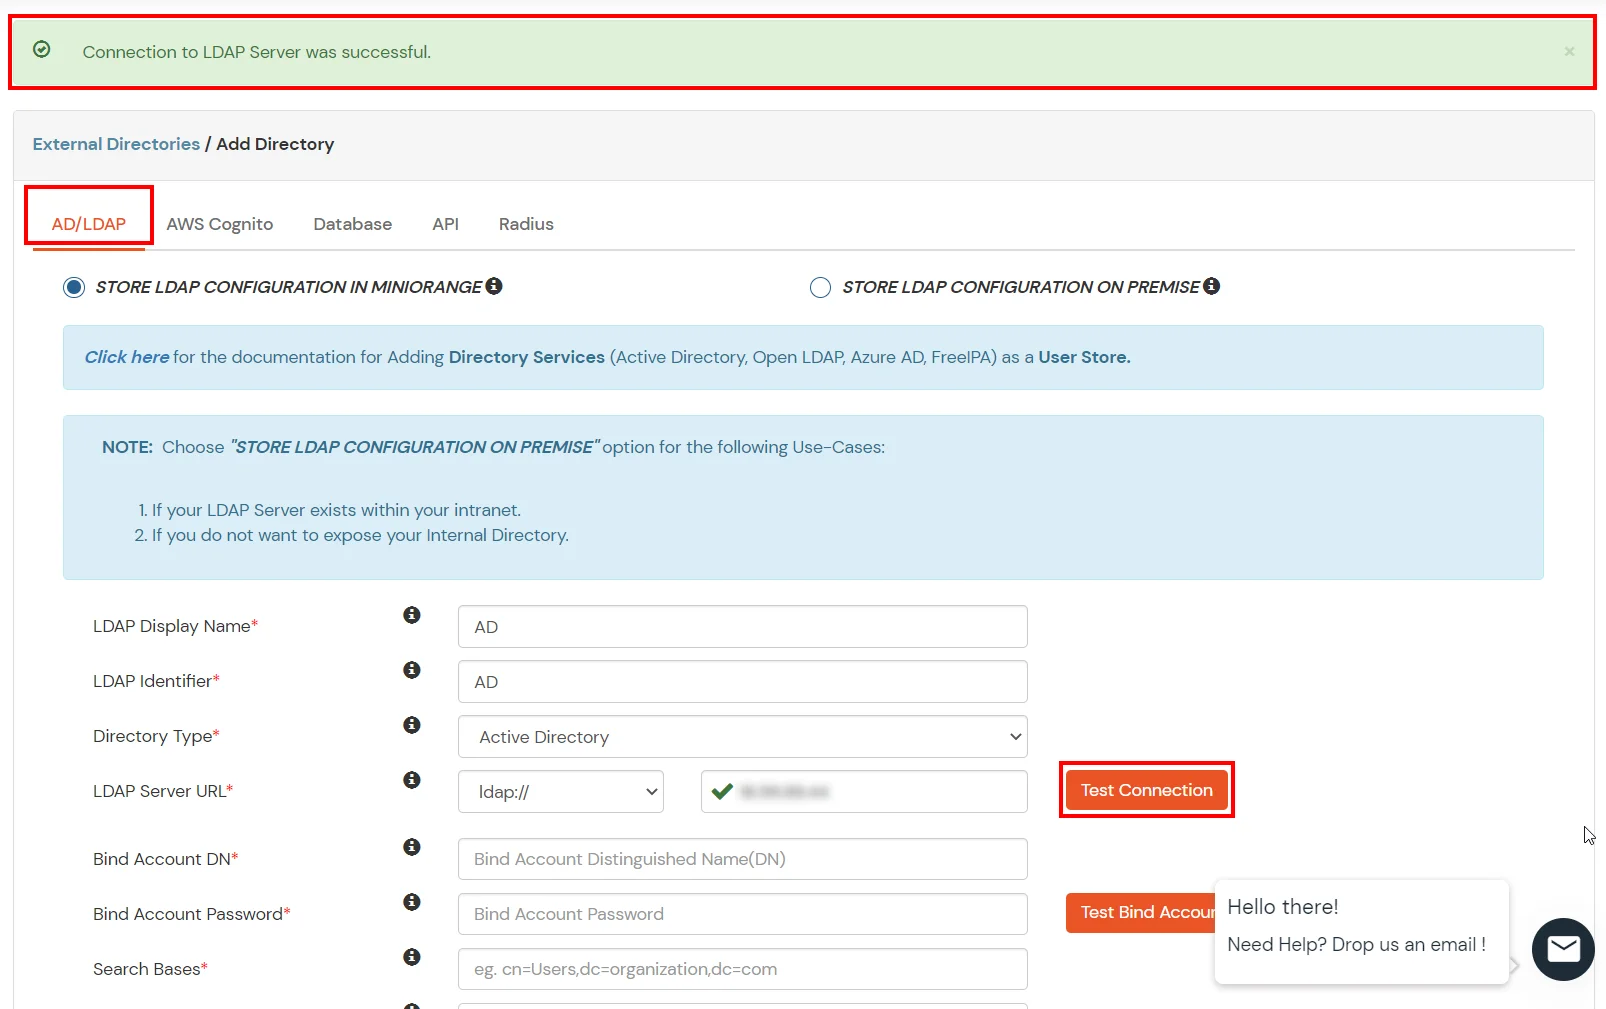
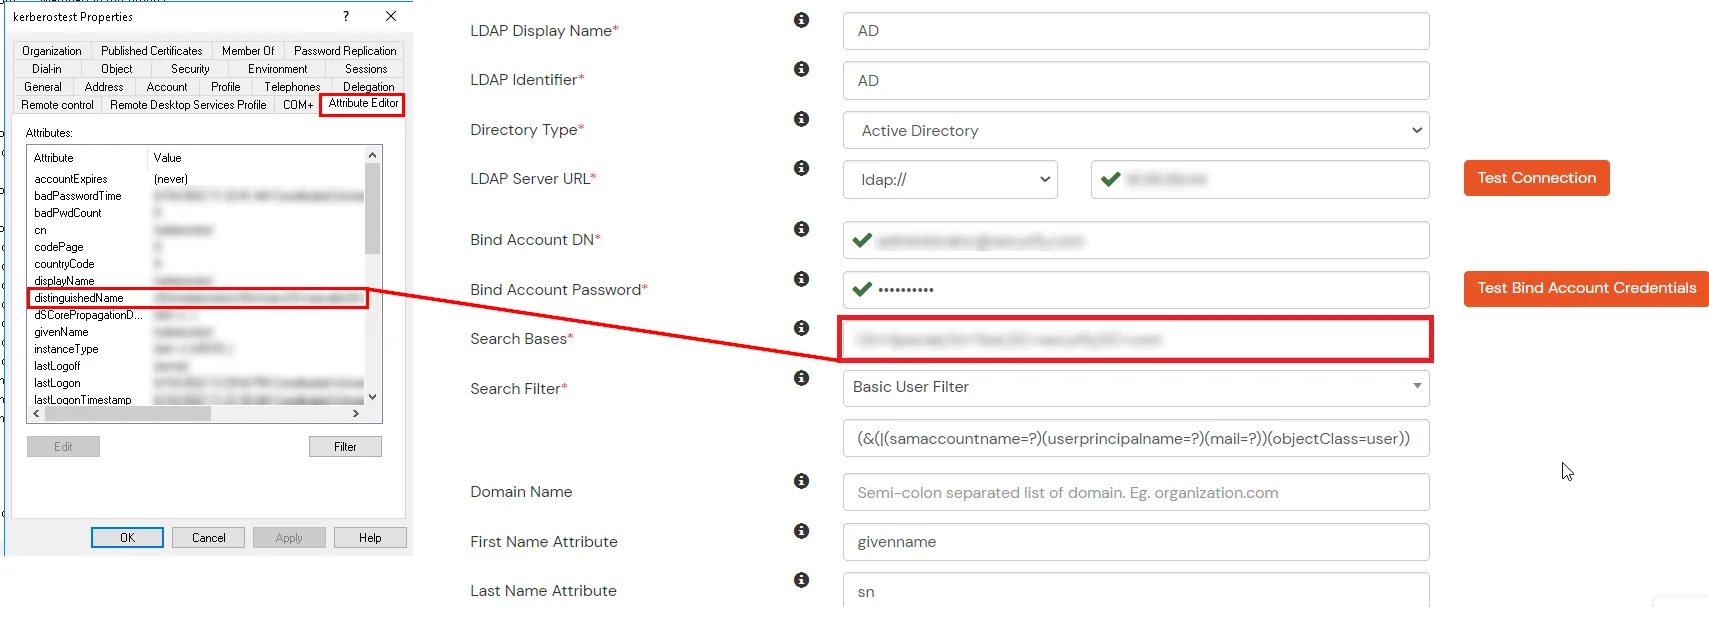
Enter LDAP Display Name and LDAP Identifier name. Select Directory Type as Active Directory. Enter the LDAP Server URL or IP Address against LDAP Server URL field. Click on Test Connection button to verify if you have made a successful connection with your LDAP server.
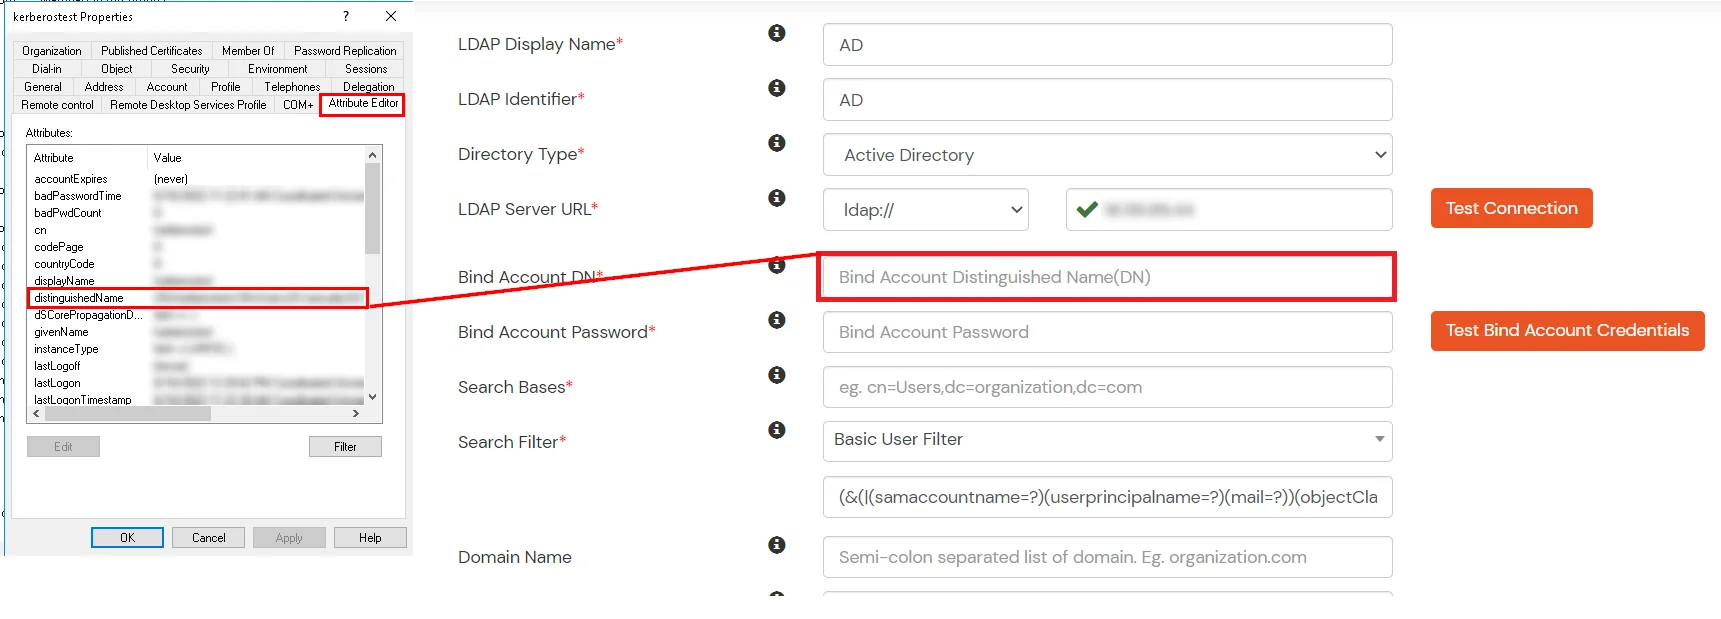
In Active Directory, go to the properties of user containers/OU’s and search for Distinguished Name attribute.
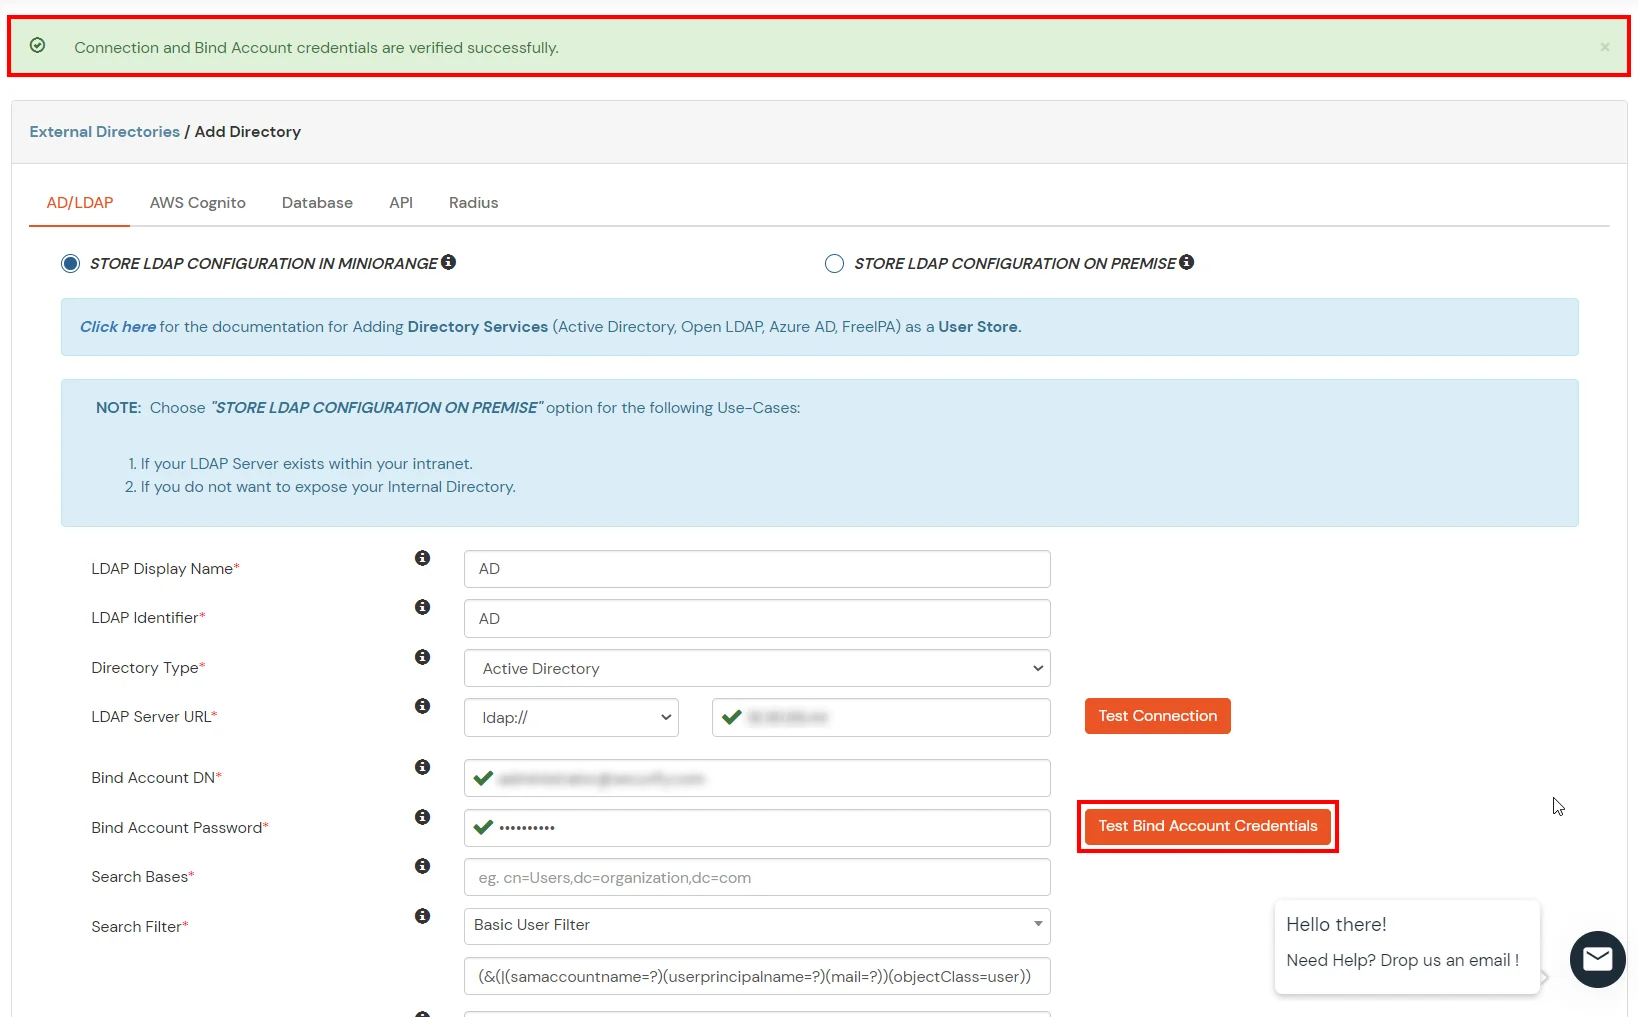
Enter the valid Bind account Password. Click on Test Bind Account Credentials button to verify your LDAP Bind credentials for LDAP connection.
Search Base is the location in the directory where the search for a user begins. You will get this from the same place you got your Distinguished name.
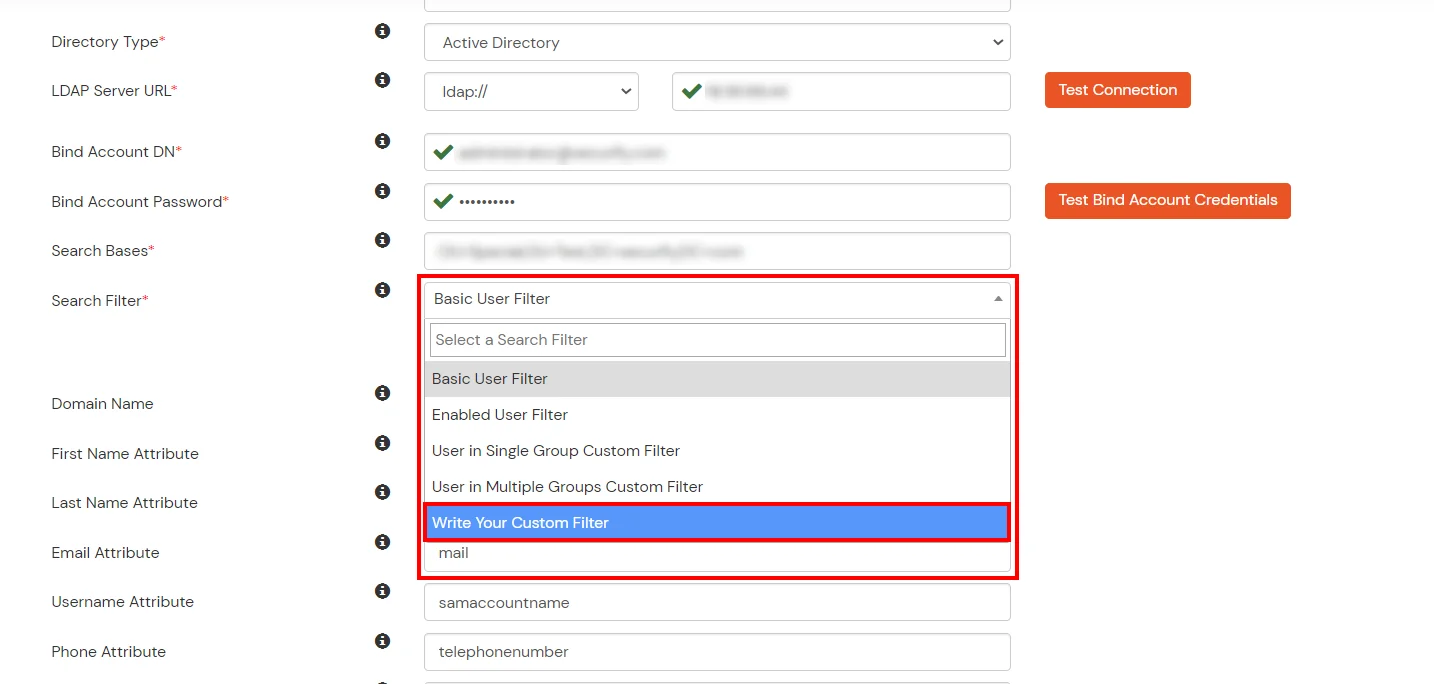
Select a suitable Search filter from the drop down menu. To use custom Search Filter select “Write your Custom Filter” option and customize it accordingly.
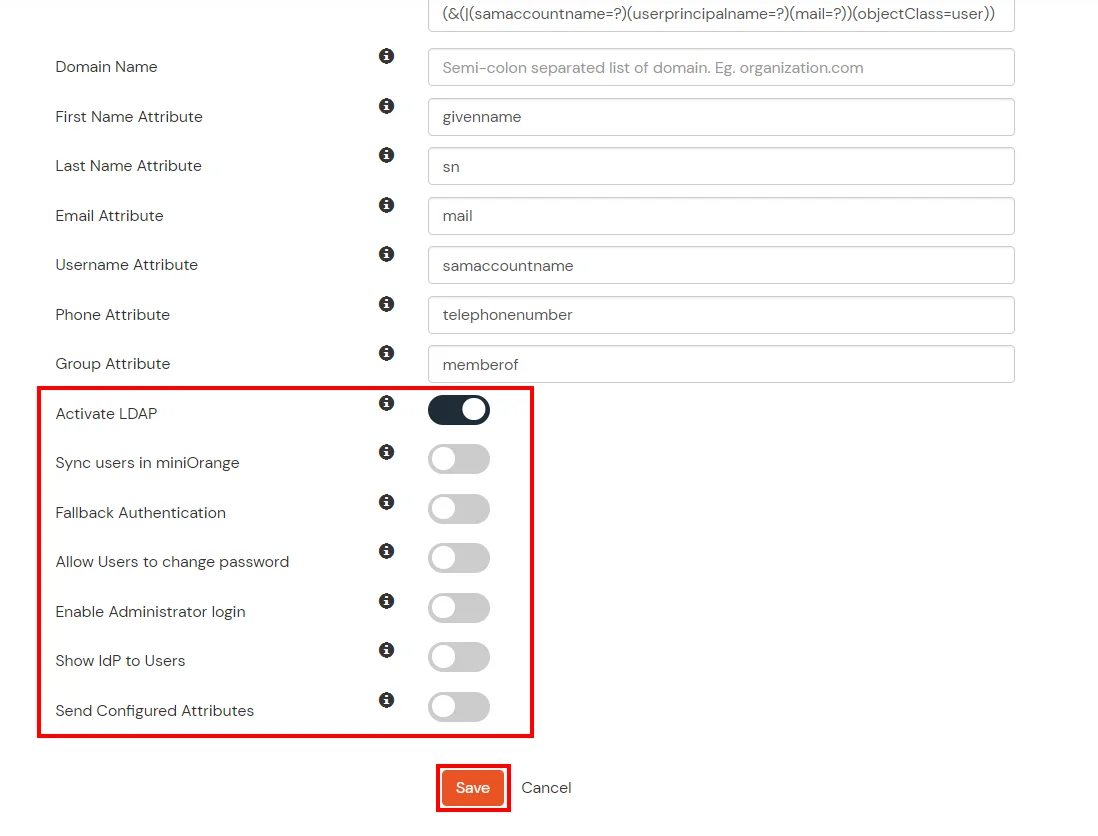
You can also configure following options while setting up AD. Enable Activate LDAP in order to authenticate users from AD/LDAP. Click on the Save button to add user store.
here ‘s the tilt of the property and what information technology dress when we enable information technology. You can enable/disable accordingly .
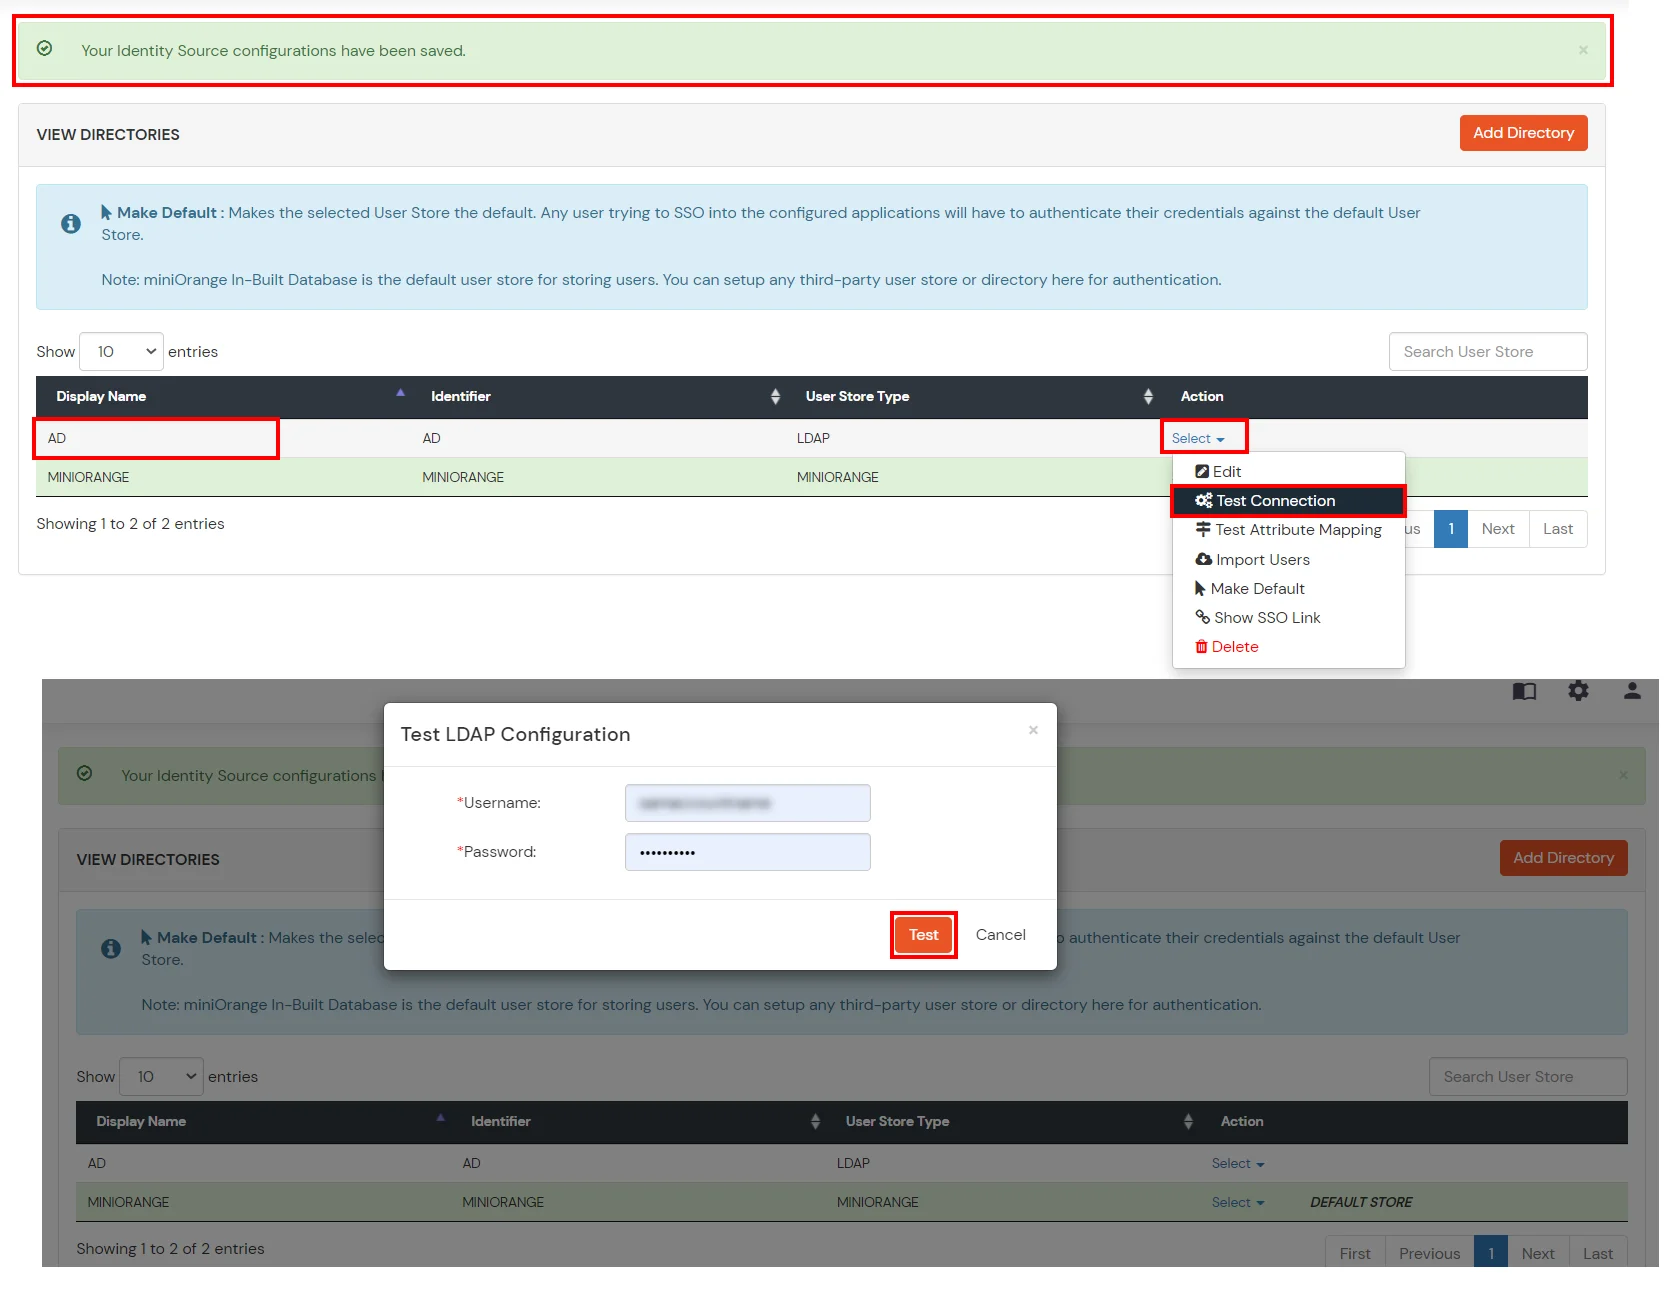
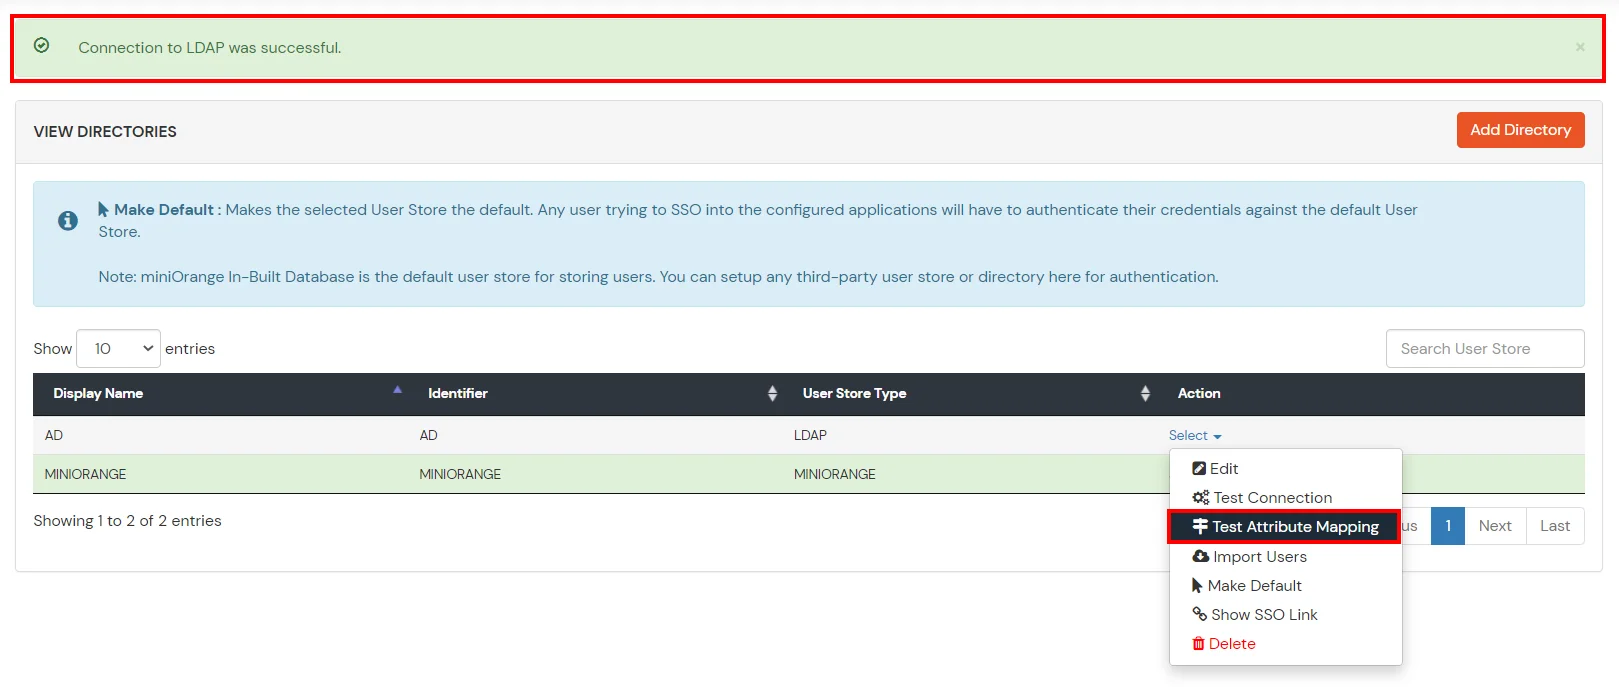
Attribute Description Activate LDAP All user authentications will be done with LDAP credentials if you Activate it Sync users in miniOrange Users will be created in miniOrange after authentication with LDAP Fallback Authentication If LDAP credentials fail then user will be authenticated through miniOrange Allow users to change password This allows your users to change their password. It updates the new credentials in your LDAP server Enable administrator login On enabling this, your miniOrange Administrator login authenticates using your LDAP server Show IdP to users If you enable this option, this IdP will be visible to users Send Configured Attributes If you enable this option, then only the attributes configured below will be sent in attributes at the time of login Click on Save. After this, it will show you the list of User stores. Click on Test Connection to check whether you have enter valid details. For that, it will ask for username and password.
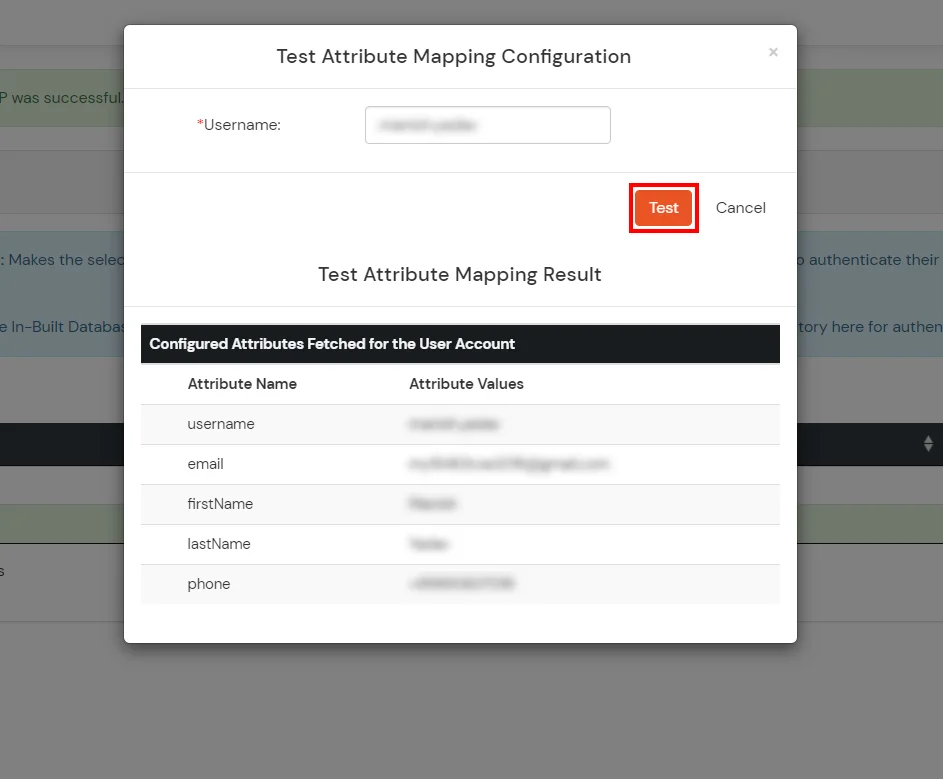
On Successful connection with LDAP Server, a success message is shown. Click on Test Attribute Mapping.
Enter a valid Username. Then, click on Test. Mapped Attributes corresponding to the user are fetched.
After successful Attribute Mapping Configuration, go back to the ldap configuration and enable Activate LDAP in order to authenticate users from AD/LDAP. mention our guide to setup LDAPS on window server .
User Import and Provisioning from AD
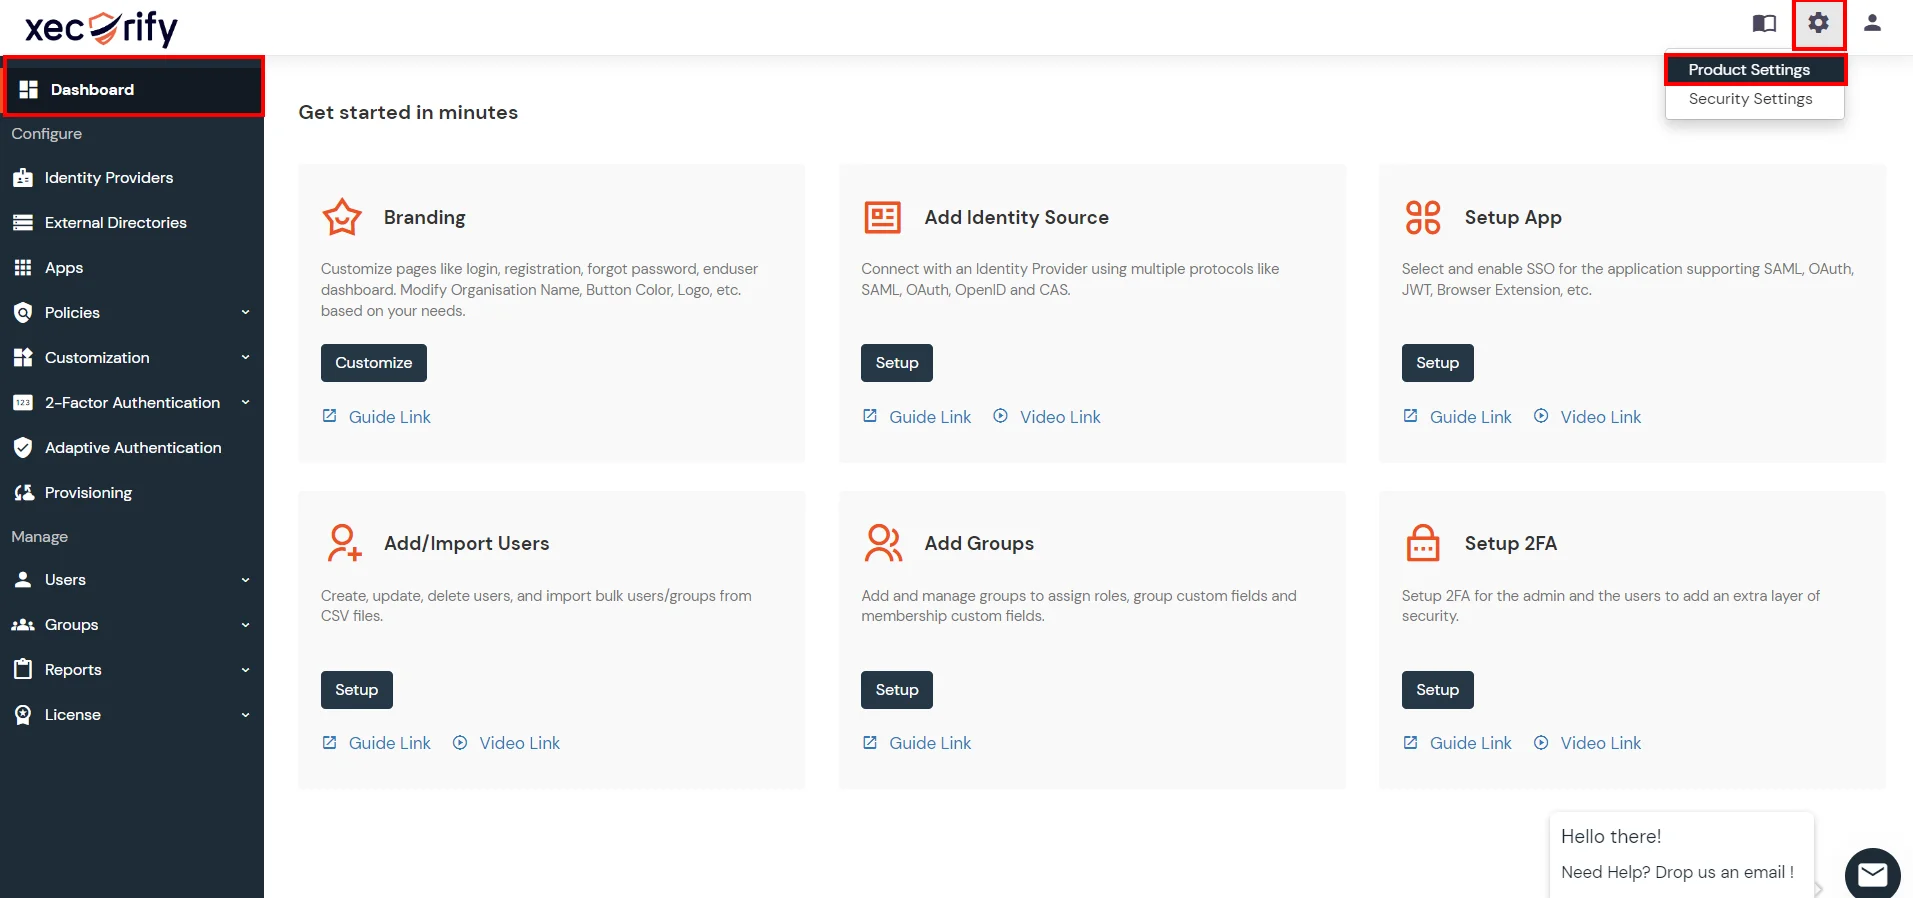
- Go to Settings >> Product Settings in the Customer Admin Account.
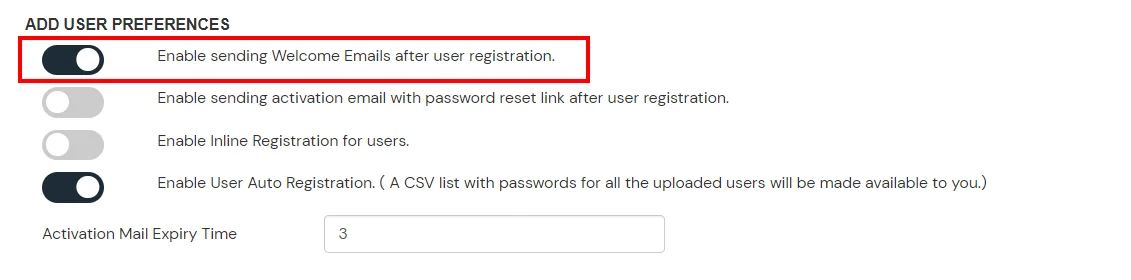
- Enable the “Enable User Auto Registration” option and click Save.
- (Optional) To send a welcome email to all the end users that will be imported, enable the “Enable sending Welcome Emails after user registration” option and click Save.
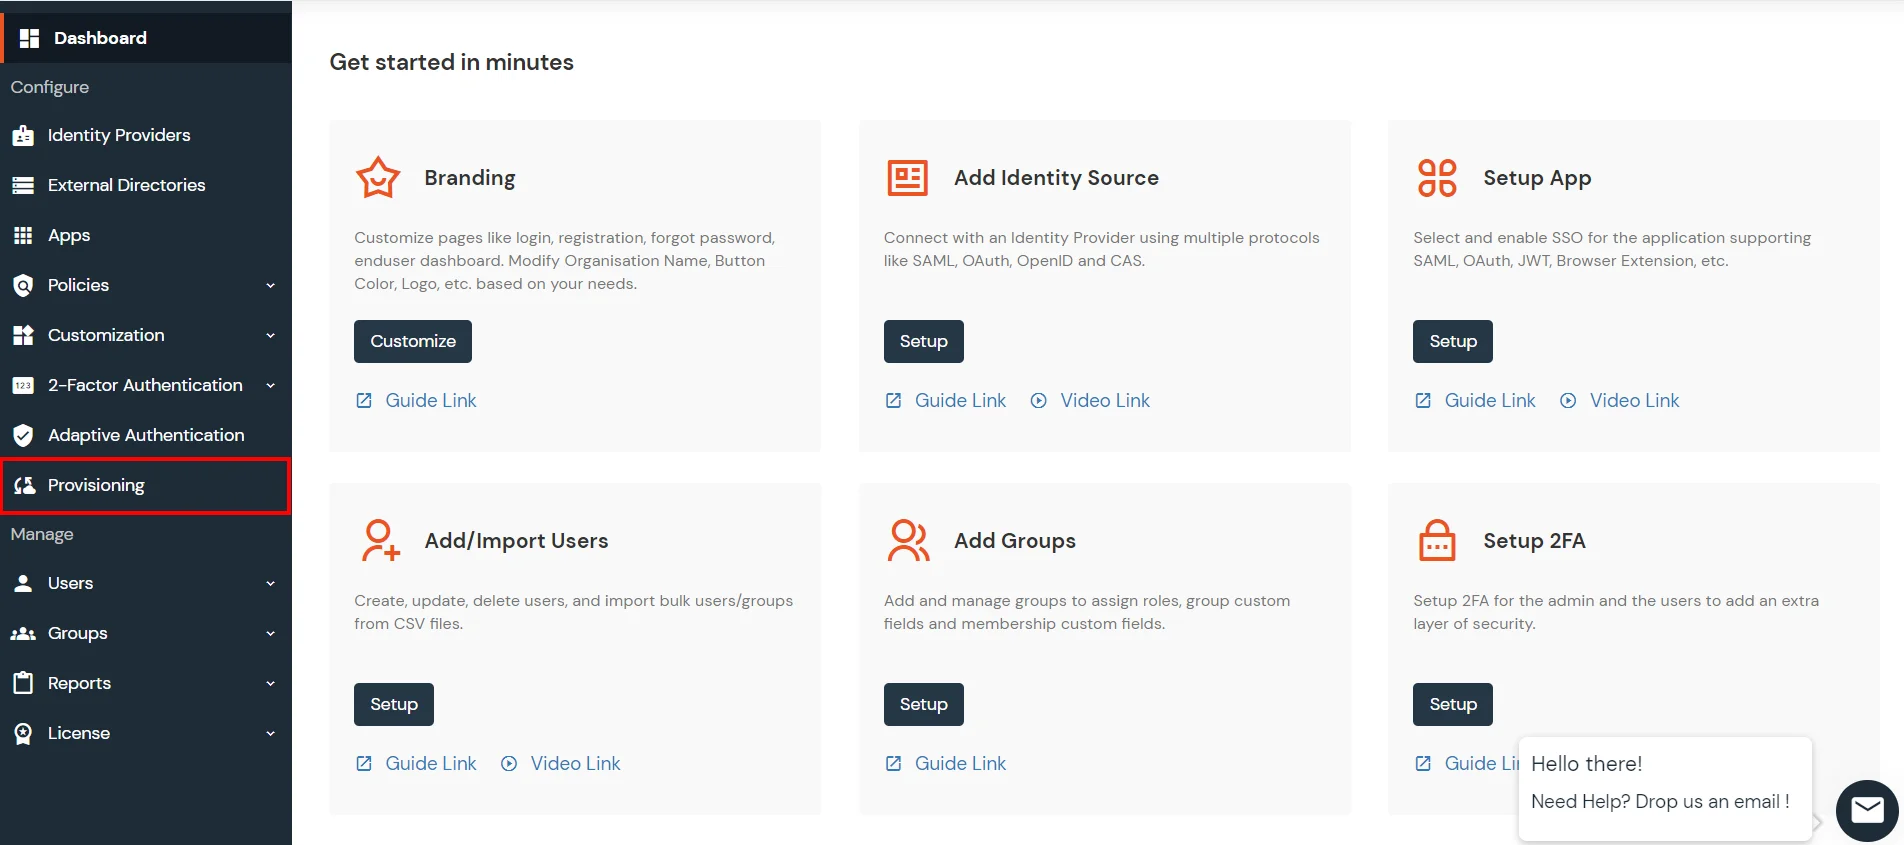
- From the Left-Side menu of the dashboard select Provisioning.
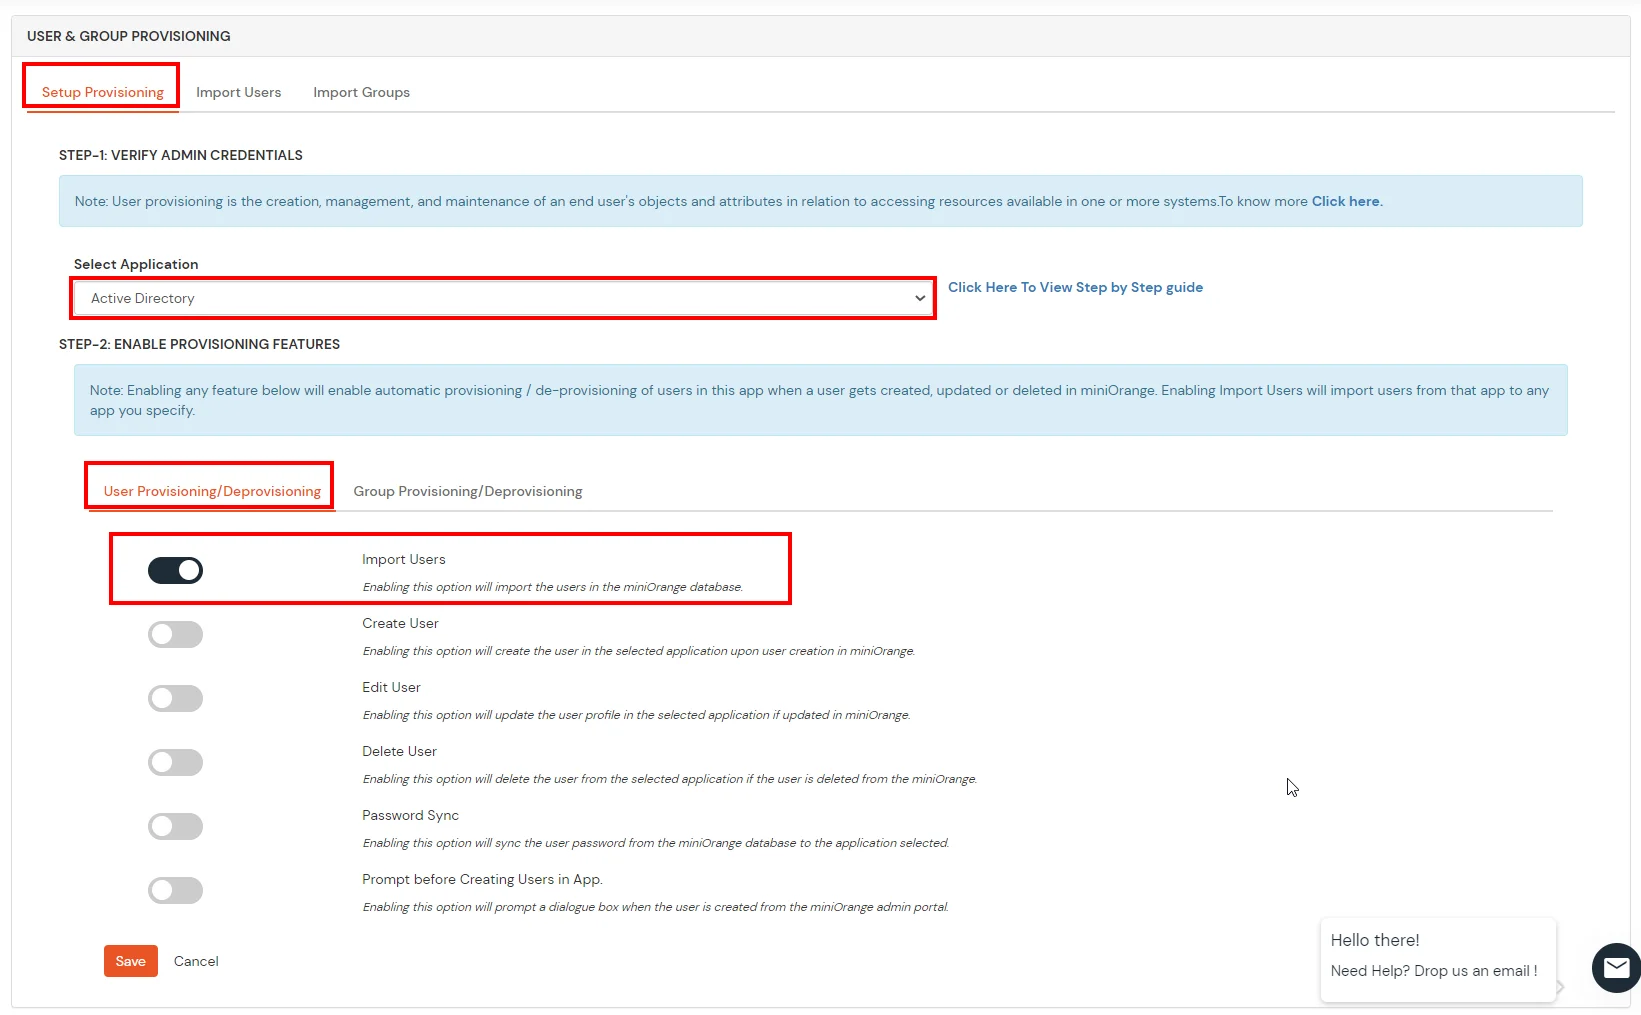
- In Setup Provisioning tab select Active Directory in the Select Application Drop Down.
- Toggle the Import Users tab, click on Save button.
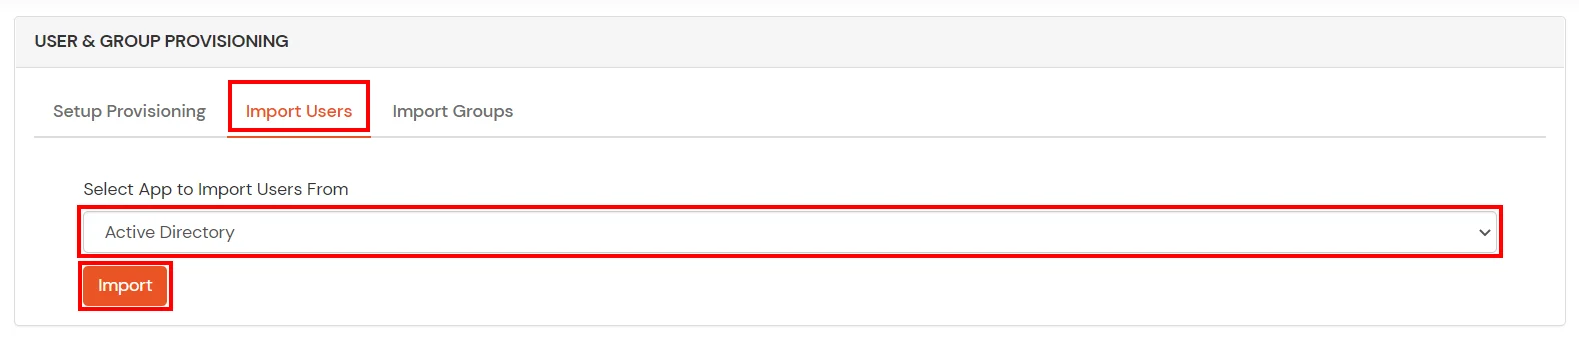
- On the same section, switch to Import Users section.
- Select Active Directory from the dropdown and click on the Import Users tab, to import all the users from Active Directory to miniOrange.
- You can view all the Users you have imports by selecting Users >> User List from Left Panel.
- All the imported users will be auto registered.
- These groups will be helpful in adding multiple 2FA policies on the applications.
miniOrange integrate with respective external drug user source such american samoa directory, identity supplier, and etc .
- Okta
- ADFS
- Ping
- AWS Cognito
- Many more
Not able to find your IdP or Need help setting it up?
Contact us oregon e-mail uracil at idpsupport@xecurify.com and we ‘ll help you set information technology up in no time .
5. Adaptive Authentication with Zoom
A. Restricting access to Zoom with IP Blocking
You can practice adaptive authentication with soar unmarried Sign-On ( SSO ) to better the security and functionality of single Sign-On. You can leave adenine information science cover inch certain stove for SSO oregon you can traverse information technology base your necessity and you can besides challenge the exploiter to verify his authenticity. adaptive authentication do the drug user authentication base on different gene such a device idaho, placement, time of access, information science address and many more .
You can configure Adaptive Authentication with IP Blocking in following way:- Login to Self Service Console >> Adaptive Authentication.
- Add a Policy Name for your Adaptive Authentication Policy.
- Select your Action for behaviour Change and Challenge Type for user from the Action for behaviour Change Section.
Action for behaviour Change Options :
Attribute Description Allow Allow user to authenticate and use services if Adaptive authentication condition is true. Challenge Challenge users with one of the three methods mentioned below for verifying user authenticity. Deny Deny user authentications and access to services if Adaptive authentication condition is true. Challenge Type Options :
Attribute Description User second Factor The User needs to authenticate using the second factor he has opted or assigned for such as - OTP over SMS
- PUSH Notification
- OTP over Email
- And 12 more methods.
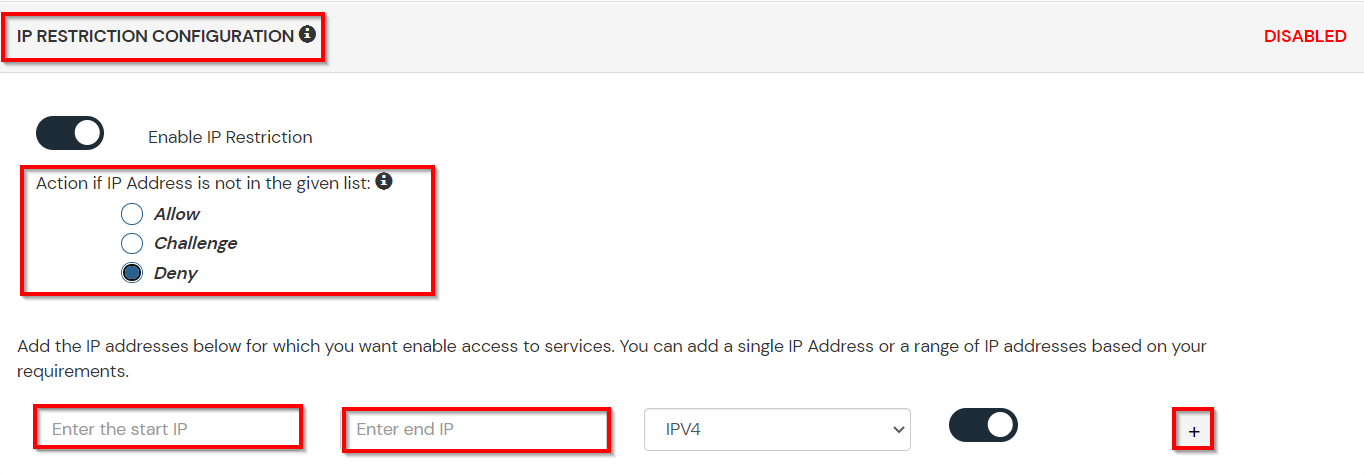
KBA (Knowledge-based authentication) The System will ask user for 2 of 3 questions he has configured in his Self Service Console. Only after right answer to both questions user is allowed to proceed further. OTP over Alternate Email User will receive a OTP on the alternate email he has configured threw Self Service Console. Once user provides the correct OTP he is allowed to proceed further. - Now Enable Enable IP Restriction option from the IP RESTRICTION CONFIGURATION section to configure custom IP range.
- Select the Action you want to perform if the IP address is out of the range. i.e. Allow, Challenge & Deny.
- Specify the IP Address range for which you want above setting to reflect. You can add more than one IP Address ranges by clicking on following button +.
- Scroll to the end and click on save.
B. Adaptive Authentication with Limiting number of devices.
exploitation adaptive authentication you can besides qualify the number of device the end drug user toilet access the serve on. You can leave end exploiter to access service on a fixed no. of device. The end drug user volition be able to access servicing provide by u on this situate no. of device.
Read more : Tải miễn phí Zoom – Phiên bản mới nhất năm 2023
You can configure Adaptive Authentication with Device Restriction in following way
- Login to Self Service Console >> Adaptive Authentication.
- Add a Policy Name for your Adaptive Authentication Policy.
- Select your Action for behaviour Change and Challenge Type for user from the Action for behaviour Change Section.
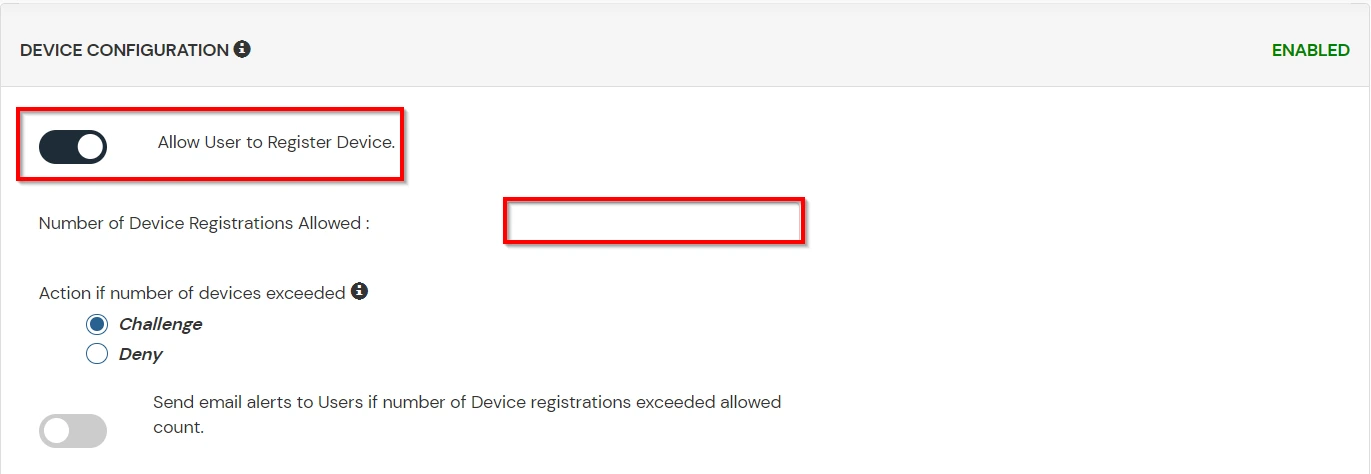
- Scroll down to Device Configuration section and enable Allow User to Register Device option to allow users to register their devices.
- Enter the Number of Devices which are allowed to register in field next to Number of Device Registrations Allowed
- Choose Action if number of devices exceeded (This will override your setting for Action for Behaviour Change.)
- Challenge: The user needs to verify himself using any of the three methods mentioned in table in step 5.1
- Deny : Deny users access to the system
Enable option Send email alerts to Users if number of Device registrations exceeded allowed count if you want to alert the user about no of devices exceeding the limit. Save the configuration.
C. Add Adaptive Authentication policy to Zoom.
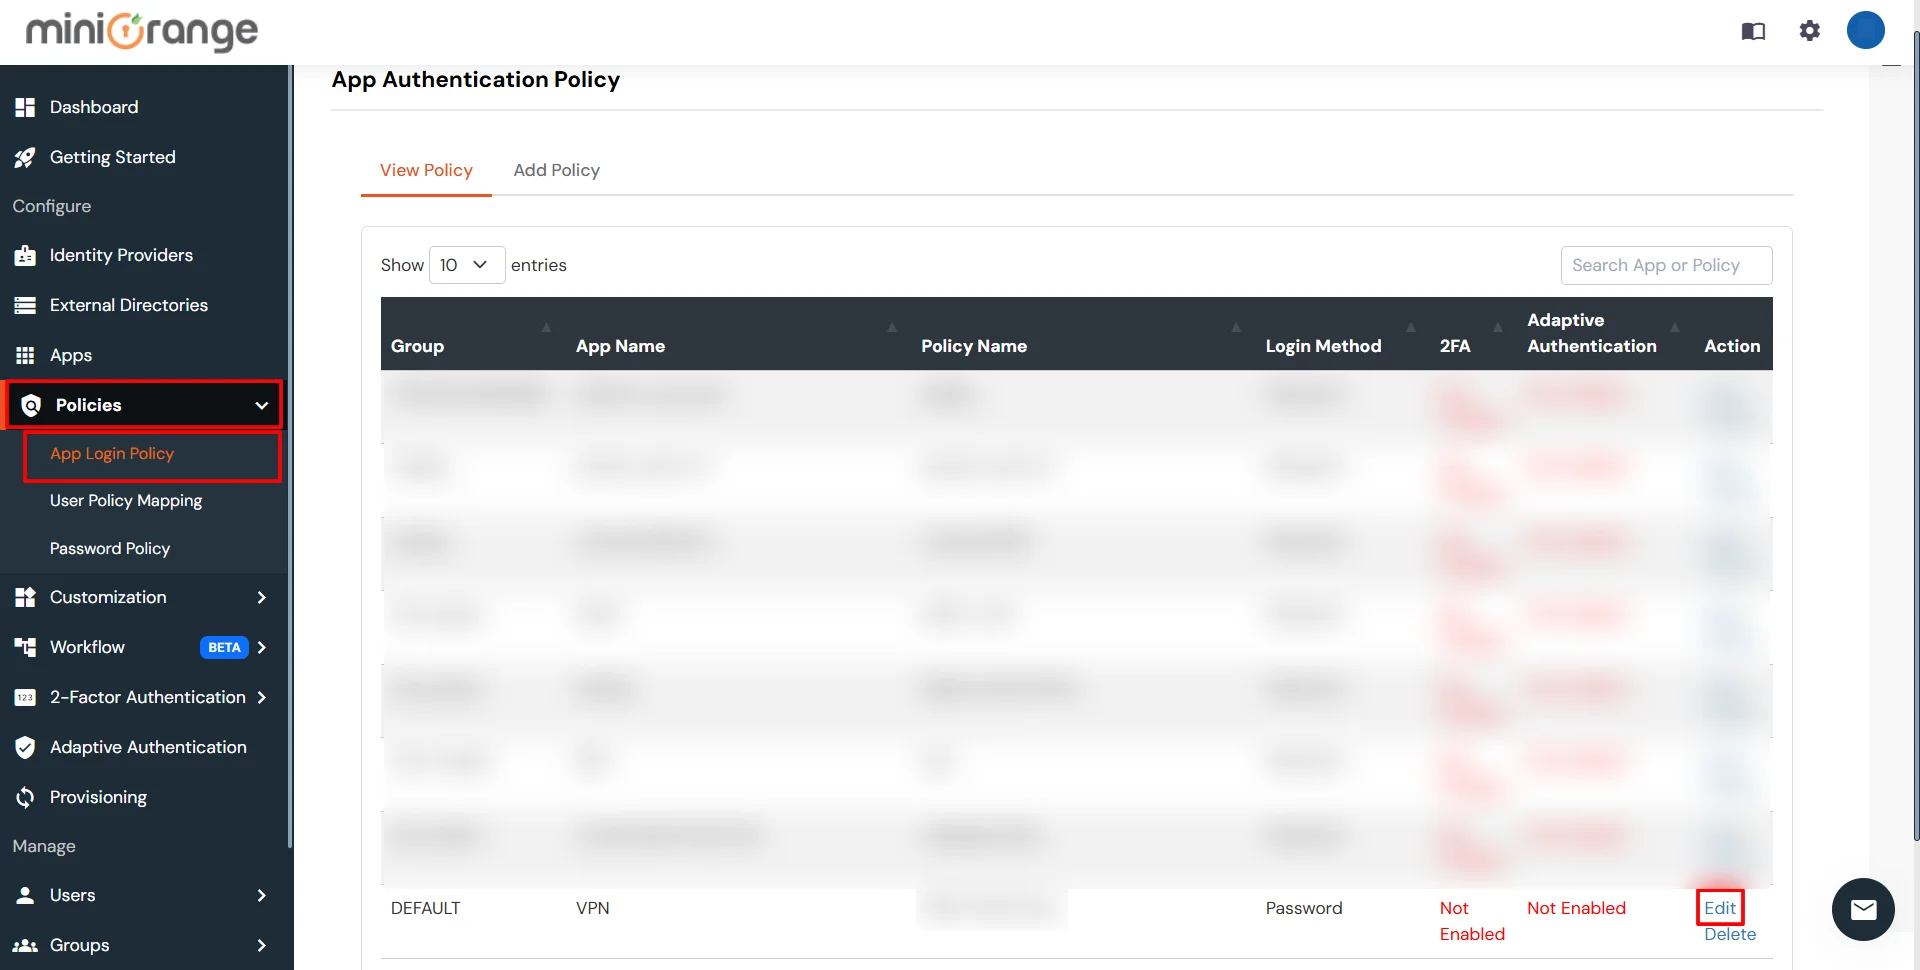
- Login to Self Service Console >> Policies.
- Click on Edit option for predefined app policy.
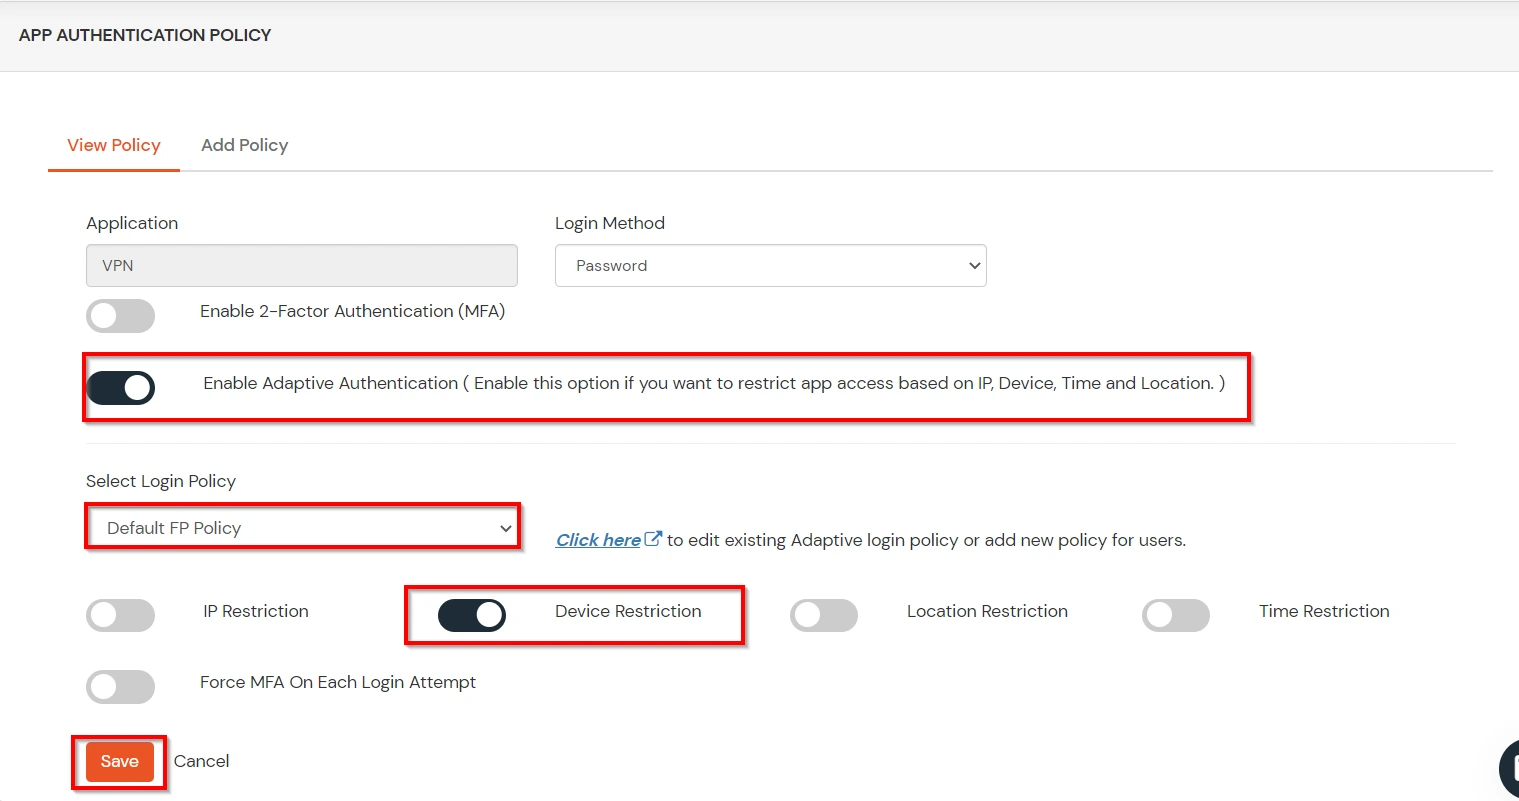
- Set your application name in the Application and select password as Login Method.
- Enable Adaptive Authentication on Policy page and select the required restriction method as an option.
- From Select Login Policy dropdown select the policy we created in last step and click on save.
D.Notification and Alert Message.


-
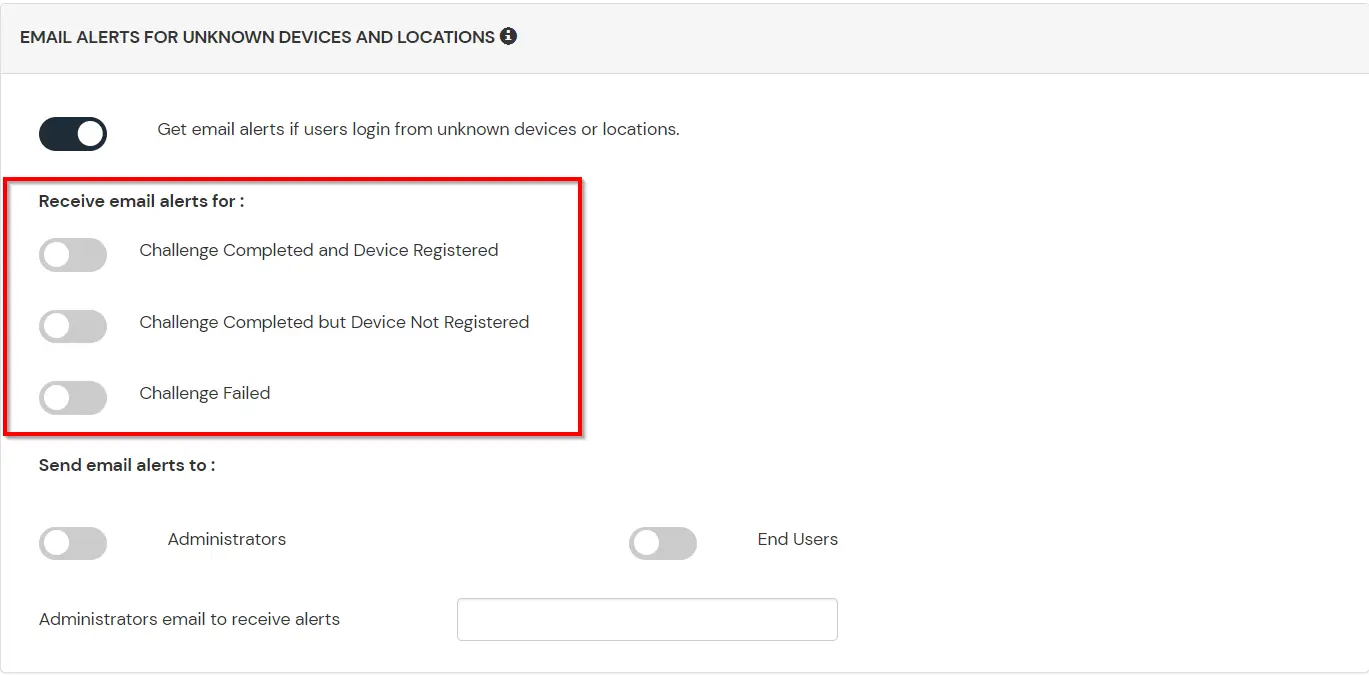
This section manage the notification and alarm related to adaptive Authentication.It provide the follow option :
- Get email alerts if users login from unknown devices or locations : Admin need to enable this option to enable receiving alerts for different alert options.
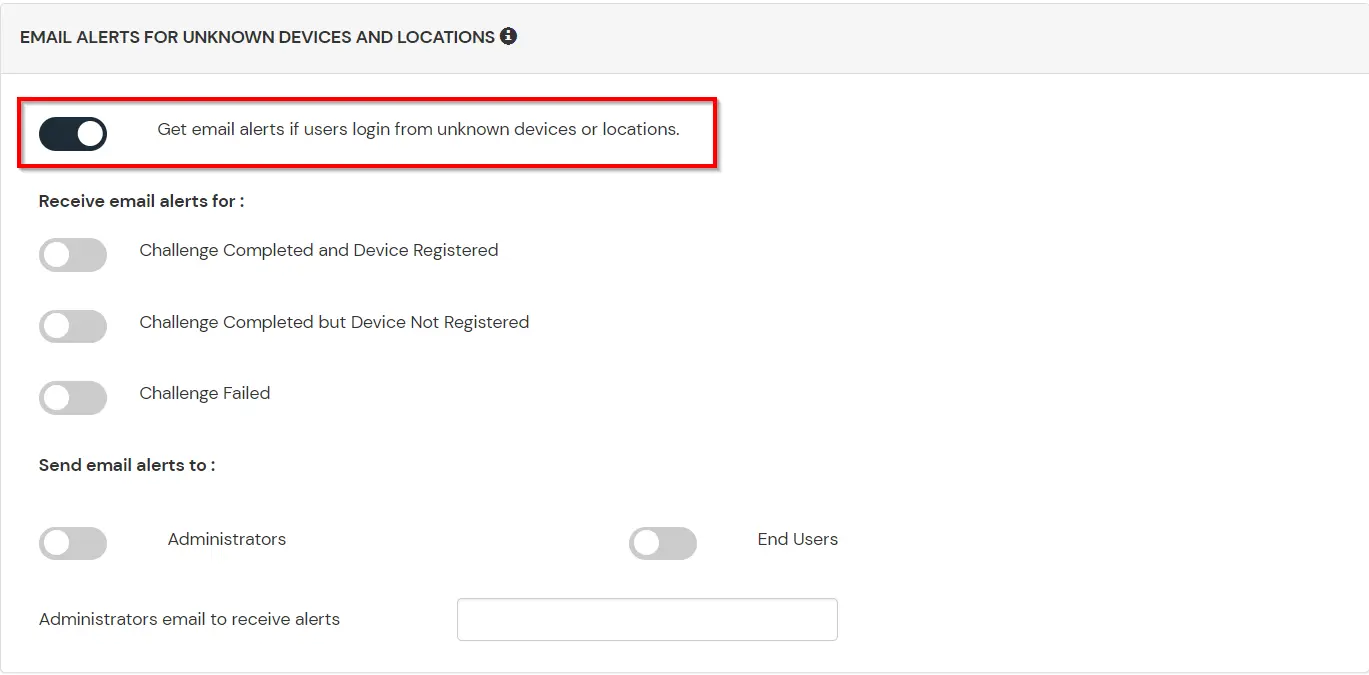
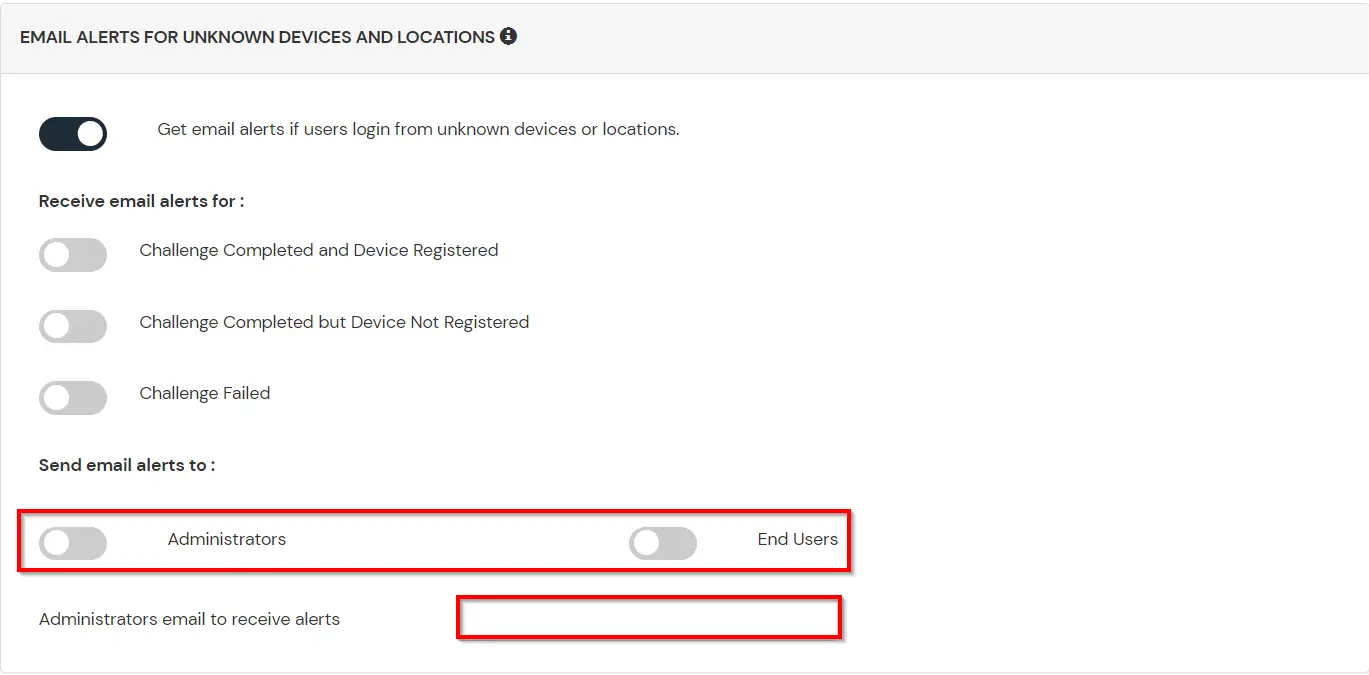
- Next subsection is Send email alerts which allows us to enable or disable alerts for admin and end-users. To enable alerts for admins, you can enable the “Administrators” switch button.
- In case you want multiple admins accounts to receive alerts then you can enable the option for admin and then enter the admin emails separated by a ‘,’ in the input field next to Administrators email to receive alerts label. To enable alerts for the end-users, you can enable the “End Users” switch button.
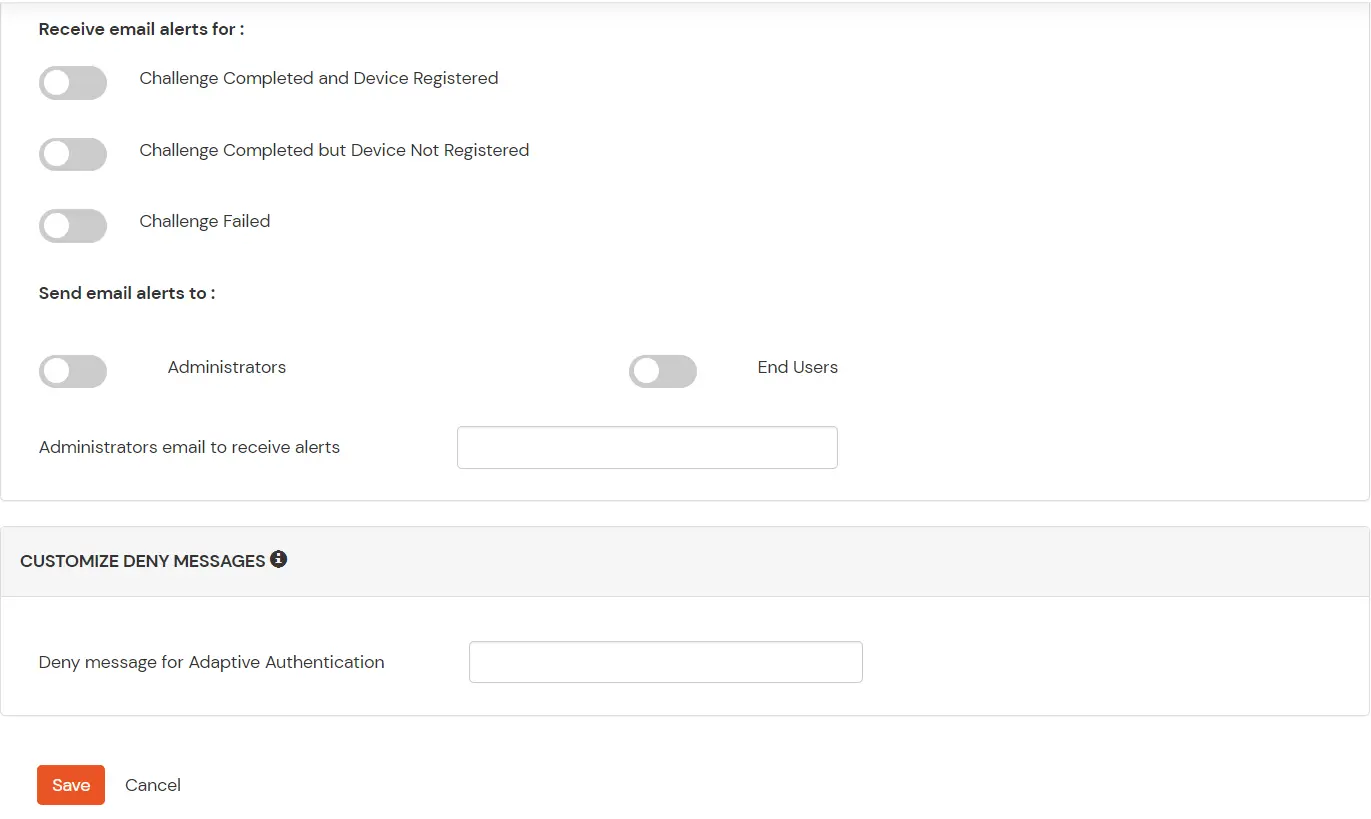
- In case you want to customize the deny message that end user receive in case his authentication denied due to adaptive policy, you can do this by entering the message inside “Deny message for Adaptive Authentication” textbox.
| Option | Description |
|---|---|
| Challenge Completed and Device Registered | Enabling this option allows you to send an email alert when an end-user completes a challenge and registers a device. |
| Challenge Completed but Device Not Registered | Enabling this option allows you to send an email alert when an end-user completes a challenge but do not registers the device. |
| Challenge Failed | Enabling this option allows you to send an email alert when an end-user fails to complete the challenge. |
How to add a trusted Device
- When End-user log in to the self service console after the policy for device restriction is on, he is provided the option to add the current device as a trusted device.